Purpose:
Use this guide to check MAC OS compatibility, prepare PC, and install the software for your SHINING 3D scanner.
After installation, confirm that the software detects the scanner and follow the calibration instructions for your model.
1. Mac Parameters & Initial Setup
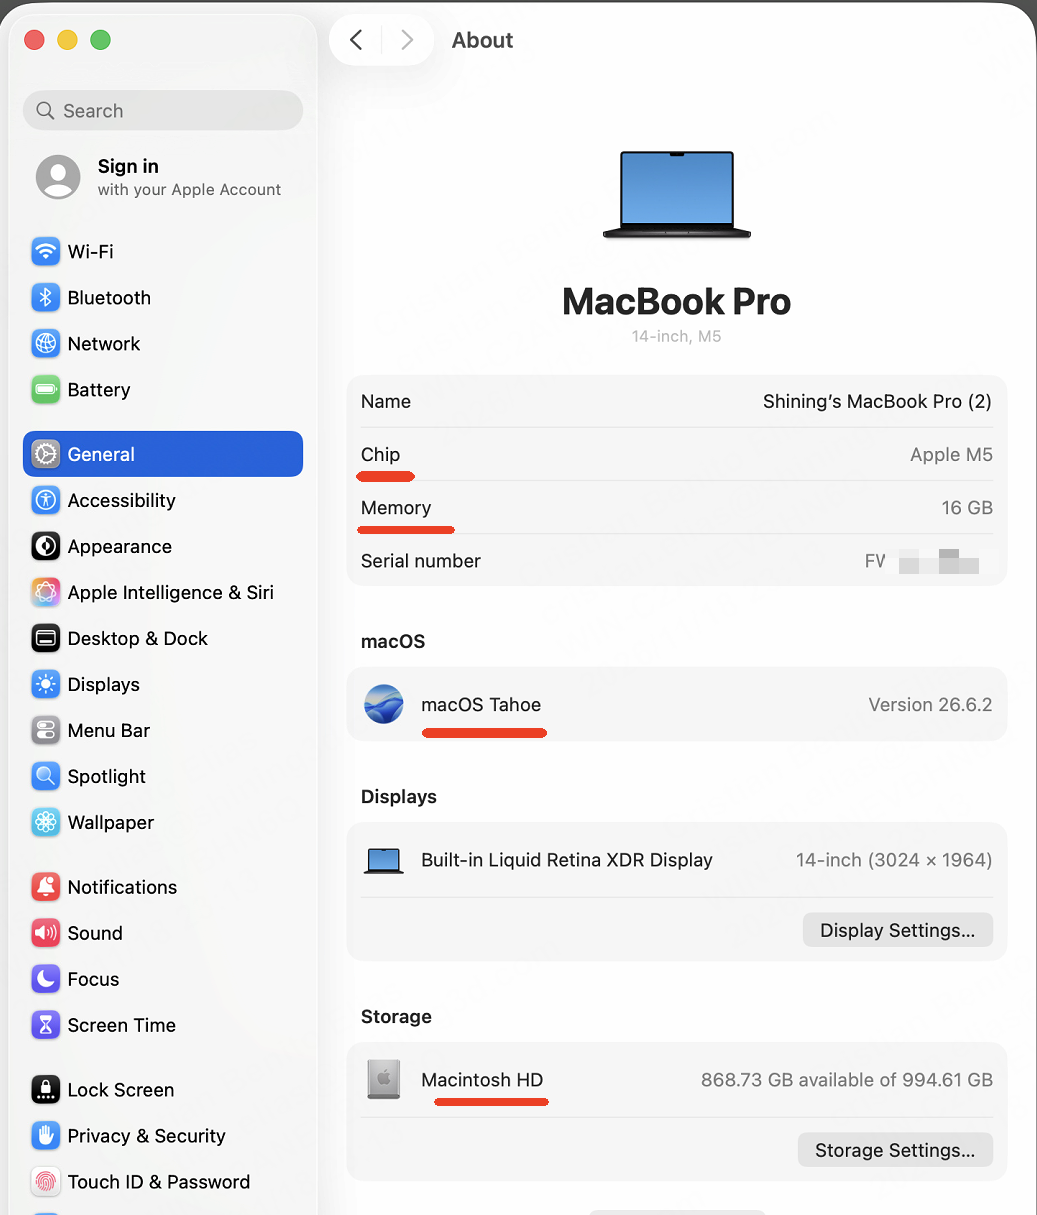
Before downloading the installer, check the supported macOS version, memory, and storage requirements for your scanner and software on the articles below.
System and Work Environment Requirements for Shining3D Products : Dental Support
Computer Models for Mac Scanning Software and Software Update Information : Dental Support
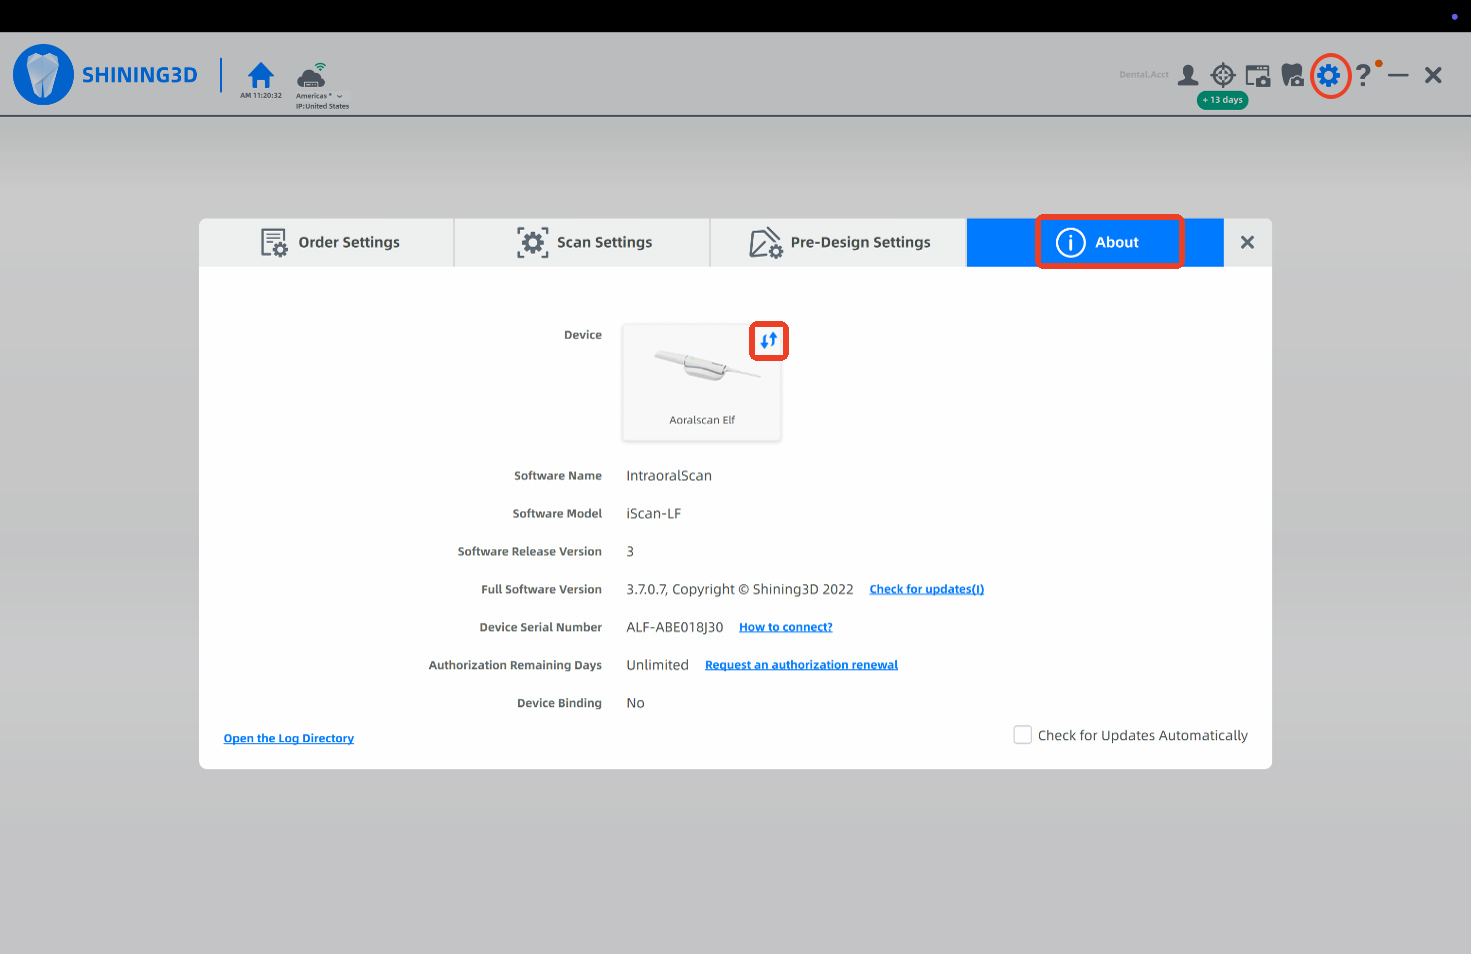
Parameters can be found in the "General → About" tab shown below in the Settings menu.
2. Perform MAC OS updates
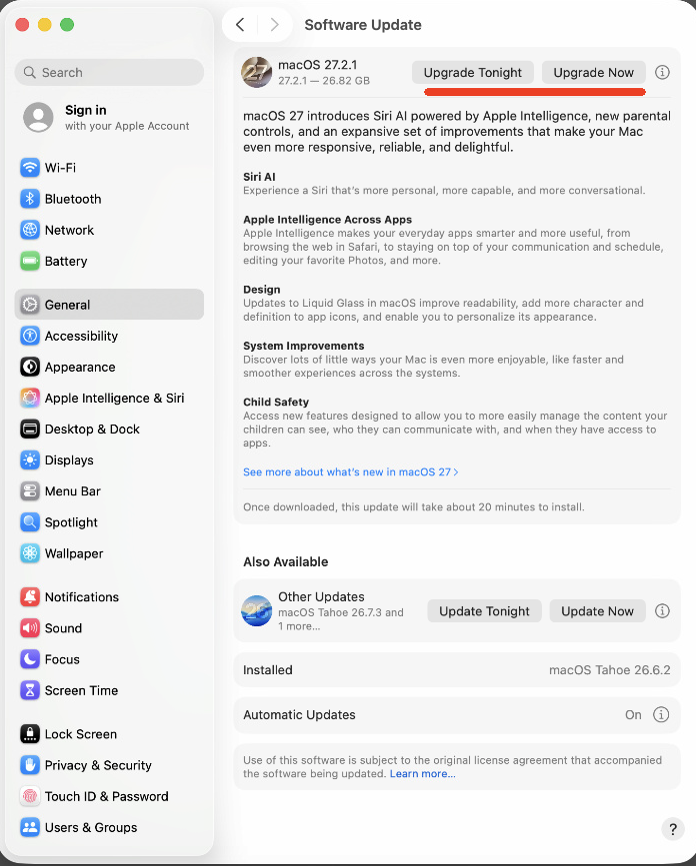
To update the MAC OS, go to "General → Software Update" tab shown below in the Settings menu.
The current macOS version is macOS 27 Golden Gate, with the latest update being macOS 27.0.1 released on September 28, 2026.
Click on appropriate update option if available for current device.
3. Download Software Version
Use the below article to find up-to-date software links for your device
Dental Software : Dental Support
Start the download process and open the file once ready.
Note: If unable to access the links from the webpage, please check the below articles
If you have an IT/Securtity deparment, please notify them of the issue as well. Contact Dental Support if needed.
IT Security, Firewall, Antivirus, and Network Filtering Issues : Dental Support
Can Not Access / Sync Cloud - IT Allowlist : Dental Support
4. Installation
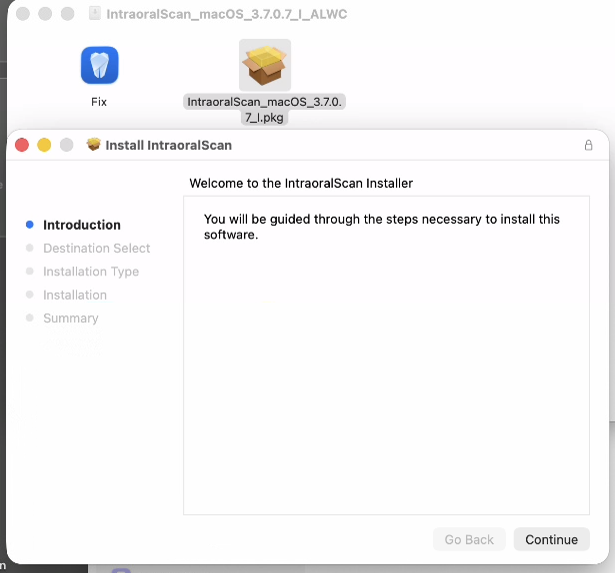
In the Installation Package, there are two files.
| 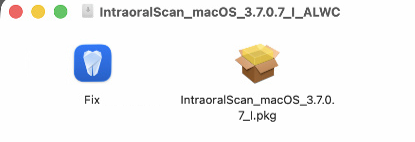 |
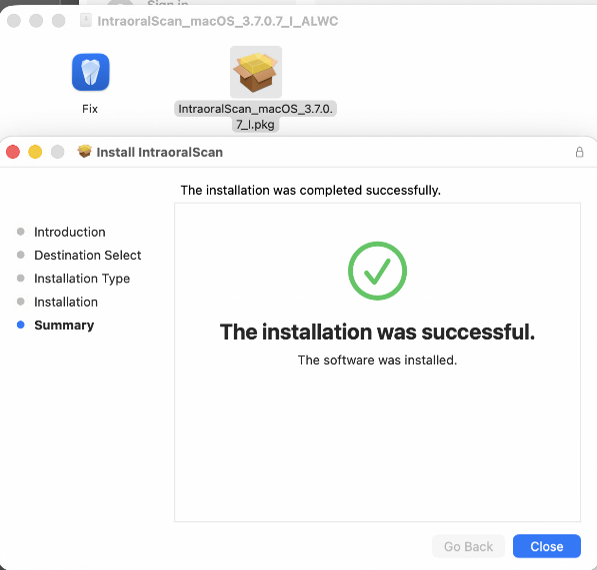
Double click the PKG file and follow prompts. Enter Password when needed.
 |  |
Install the FIX tool as outlined in the below article if network/connections issues appear
Connection Issue, Mac OS , Known issue : Dental Support
5. Launch Software
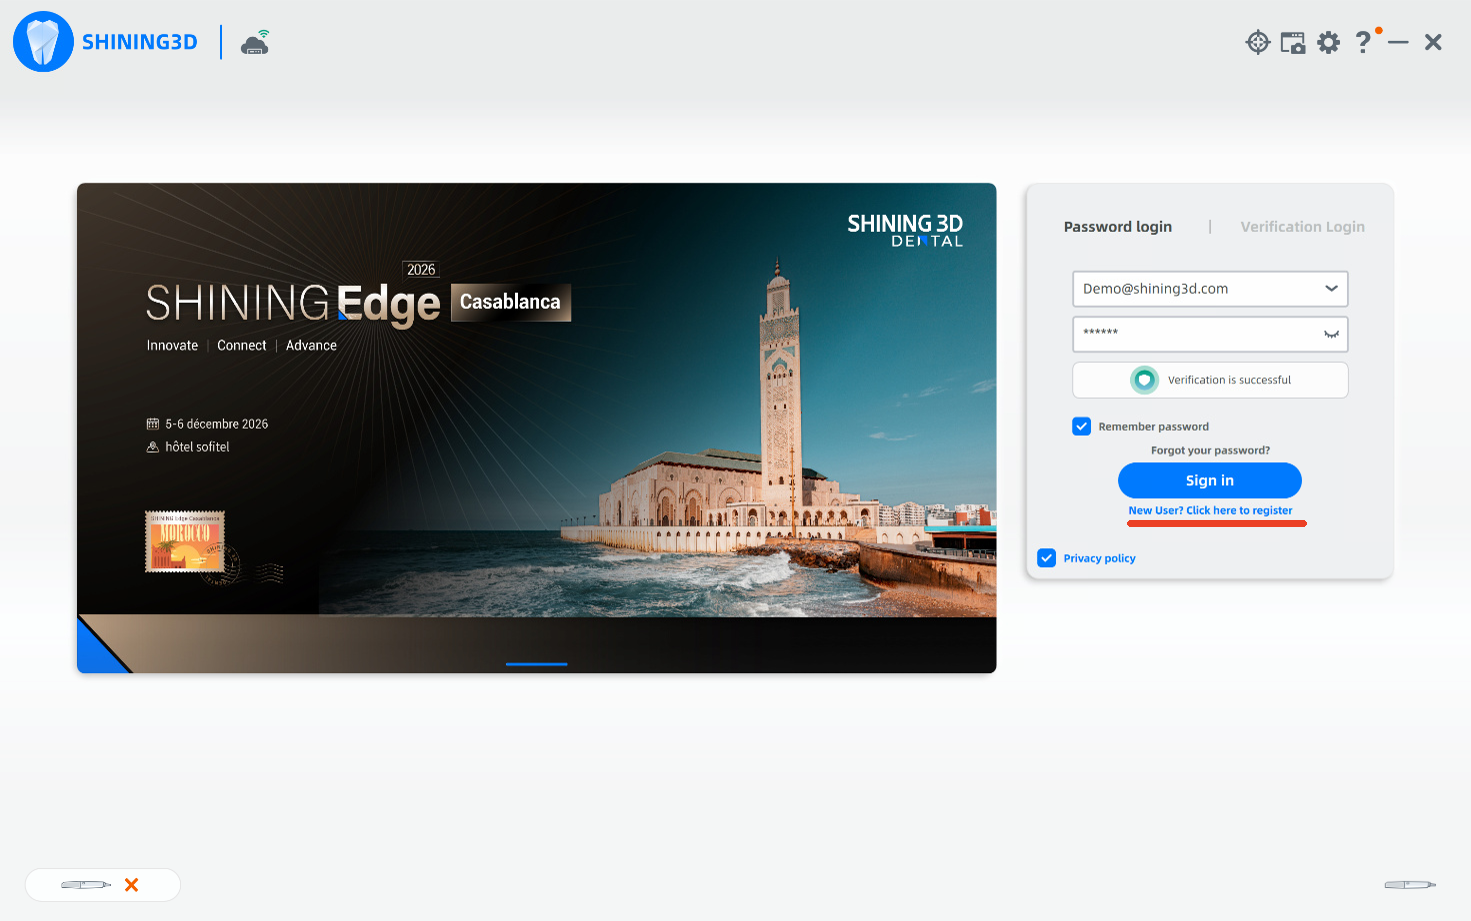
Once the Installation process is complete, launch the Software, "IntraoralScan".
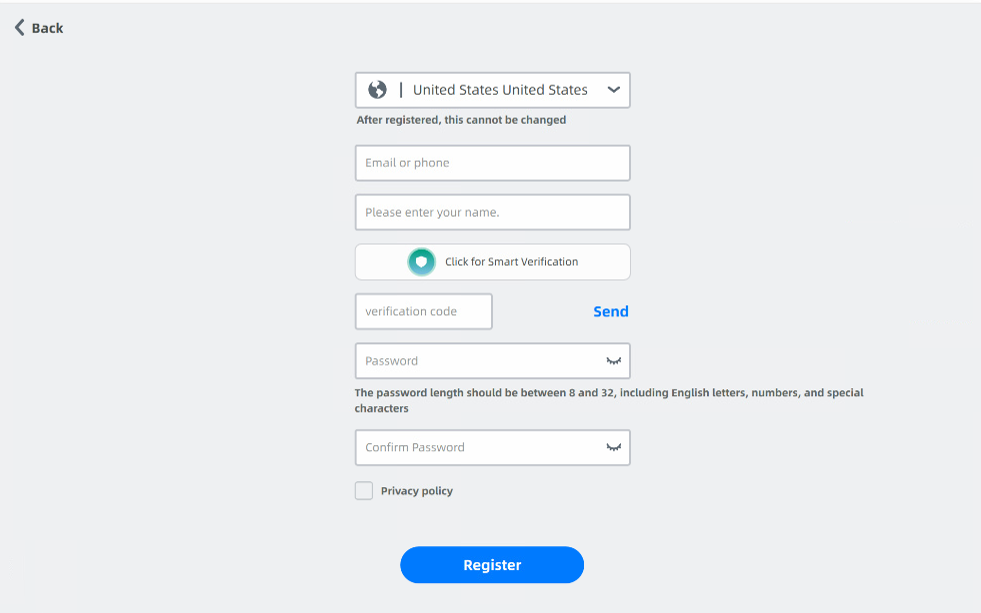
Either enter account credentials or create new account as needed.
6. Connect Device
Ensure the correct device is selected on the Software by going to "Setting → About→ Click on the Arrows icon".
If correct device is selected, software will detect and provide SN information on this page.
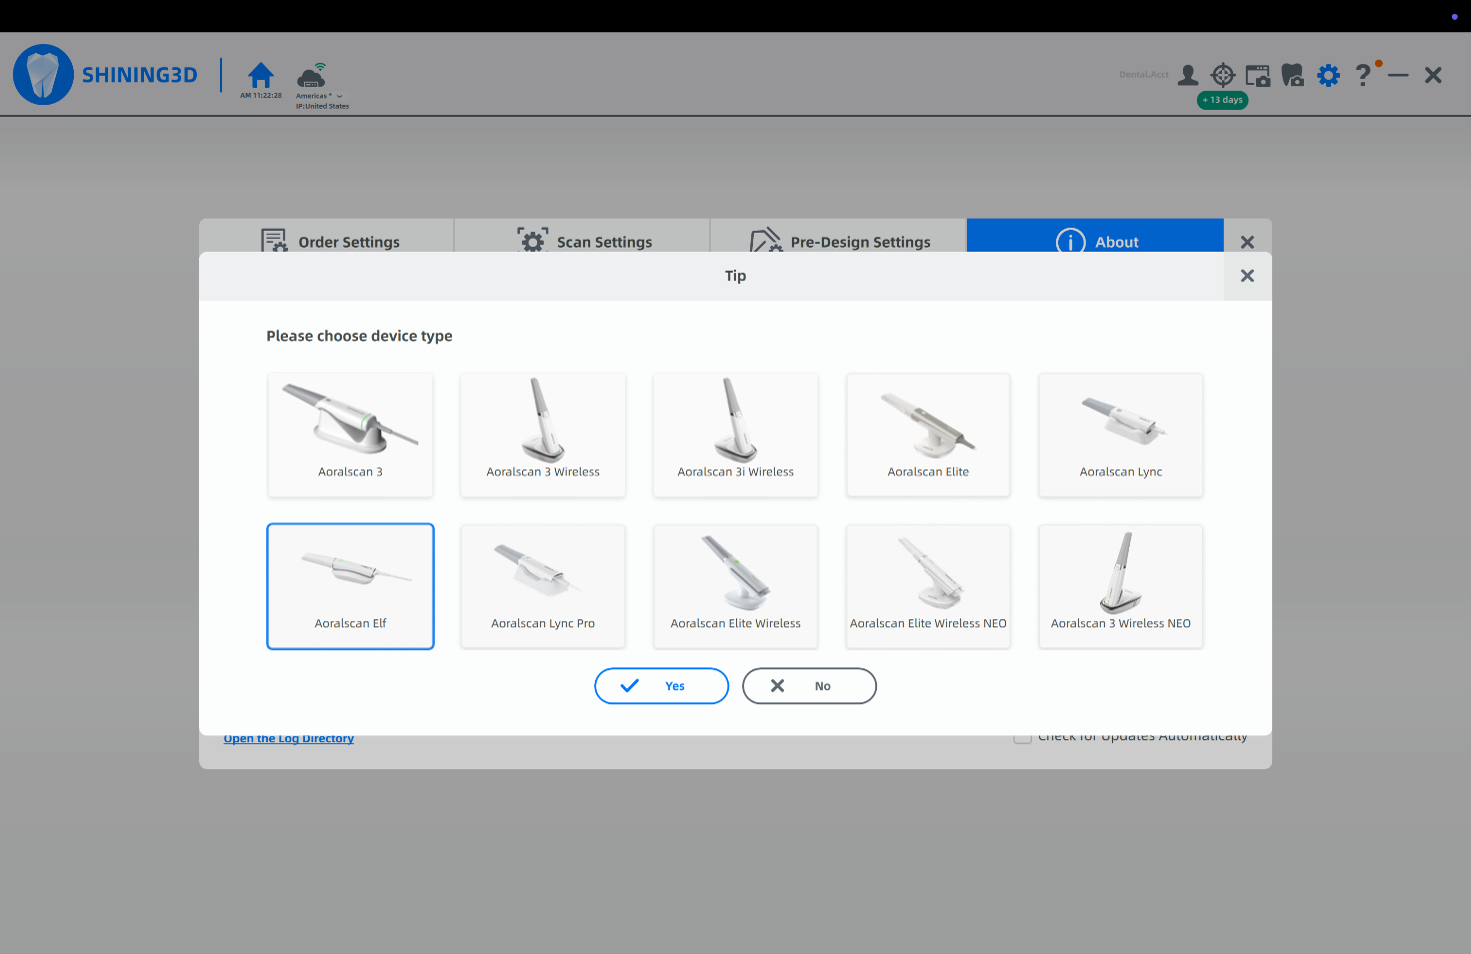
The following window will appear with all current supported devices for the software version.
Click on your scanner to ensure proper connection and check previous page.
7. First Time Activation / Use
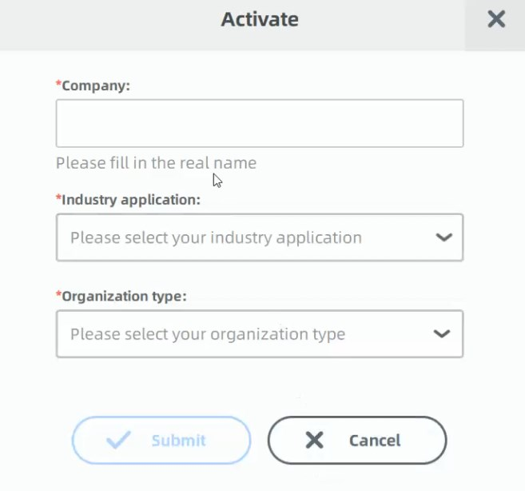
During the first time use, the following window will appear to activate the scanner.
Please input all information and click submit.
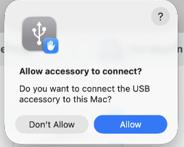
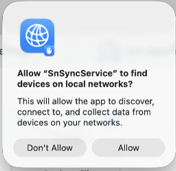
The following windows will also appear to create a network connection if aplicable.
Please click on Allow to ensure proper scanner connection.
 |  |
8. Calibration and Validation
Once the software is open and the scanner is powered on, follow these steps.
Check when the scanner was last calibrated. Click the bullseye icon at the top of the software window. A small indicator below the icon shows when the last calibration was performed.
Green — Fewer than 14 days have passed since the last calibration.
Red — More than 14 days have passed since the last calibration. Calibrate the scanner before continuing.
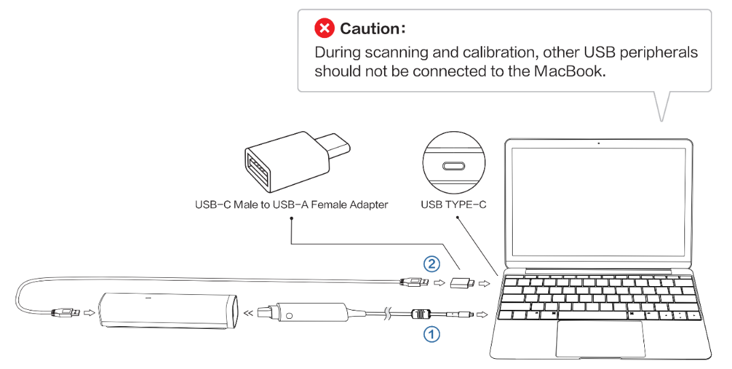
Check the scanner and calibrator connections. When the calibration window opens, make sure both the scanner and calibrator are connected and their indicator lights are on. The calibrator is powered by a USB-A to USB-A cable.
For MAC, a USB A-C adapter is needed. A USB Hub can also be used.
Run the calibration. Follow the on-screen instructions. Calibration takes approximately 3–5 minutes.
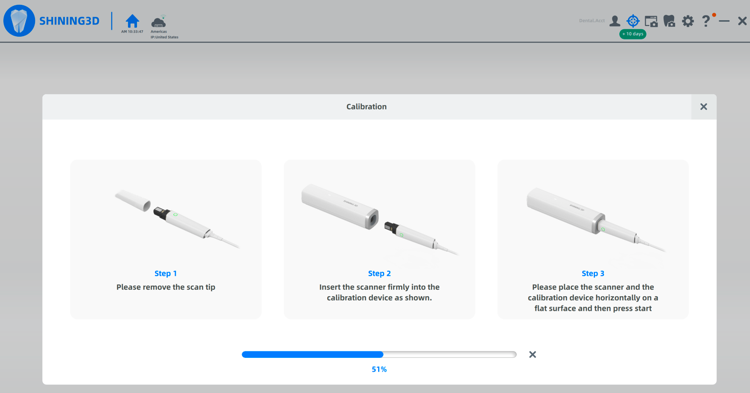
Calibrate every 14 days to maintain scan quality and scanner performance. We recommend keeping the time between calibrations to 30 days or less. For IPG cases, calibrate more frequently.
Example image for Elite scanner, please check user guide for your current scanner.
Test scan: Create a new order or test case and perform a short scan. Confirm that scan data is captured smoothly and accurately.
6. Create Shortcuts
There are two ways to create a shortcut:
- On the App Tray
- On the Desktop Screen
Creating Shortcut on App Tray/Dock
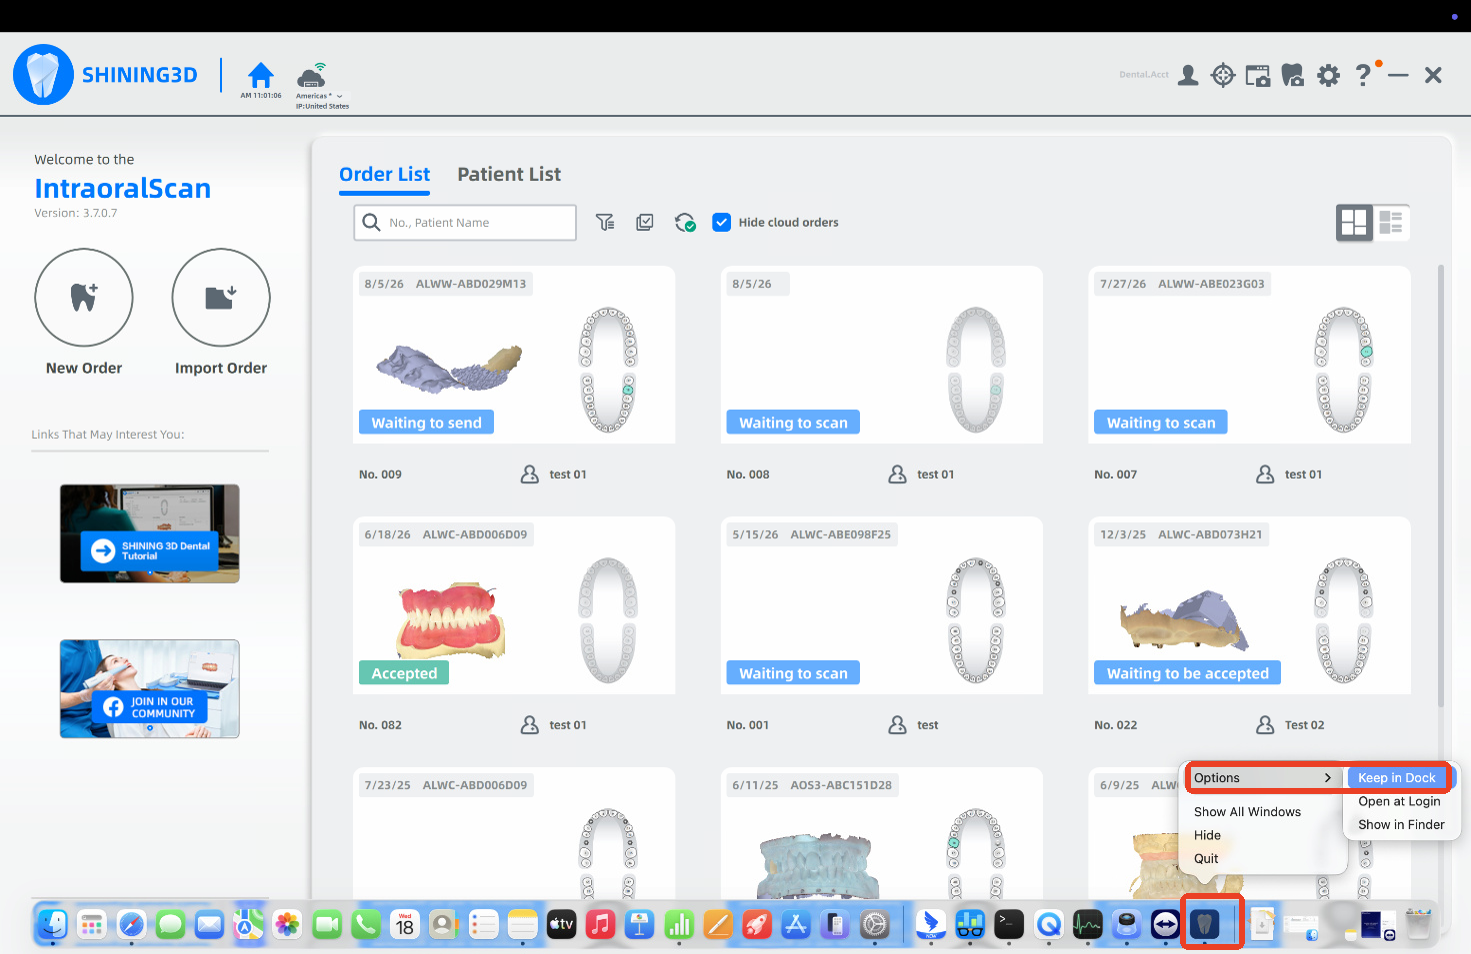
Right Click on the Icon when the software is open.
Click on Option→Keep in Dock
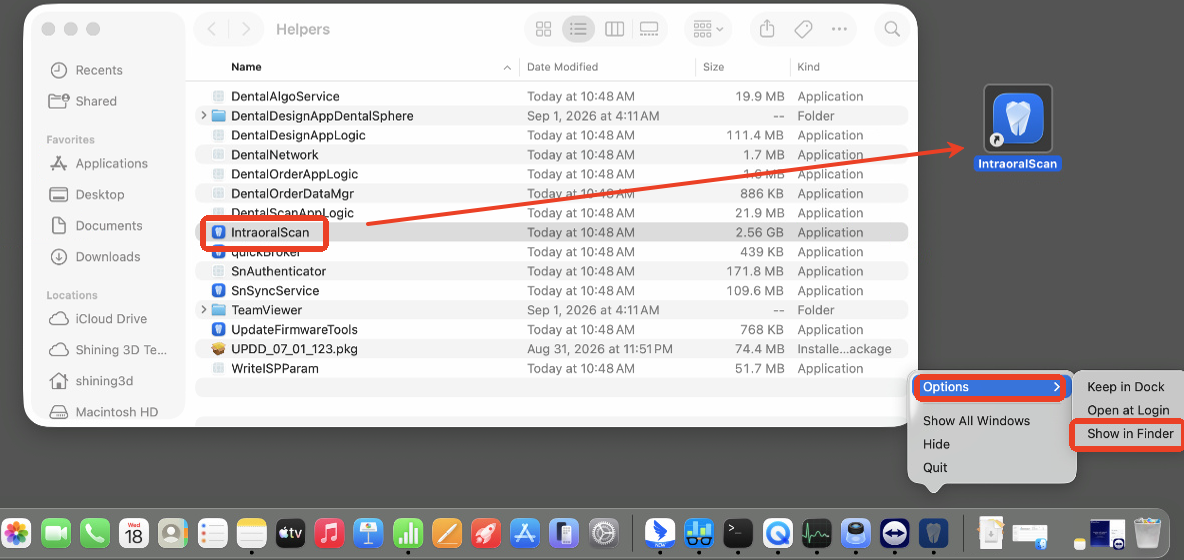
Create Shortcut on Desktop
To create a shortcut on the Desktop, right click on the app from the App Tray/Dock.
Click on Option→Show in Folder
On the file explorer that appears, click and drag the IntraoralScan file to the Desktop.