
Purpose:
This guide is to assist binding DentalLauncher and Exocad for a seamless work through.
Locate Scanning Binder application if DentalLauncher is already installed.
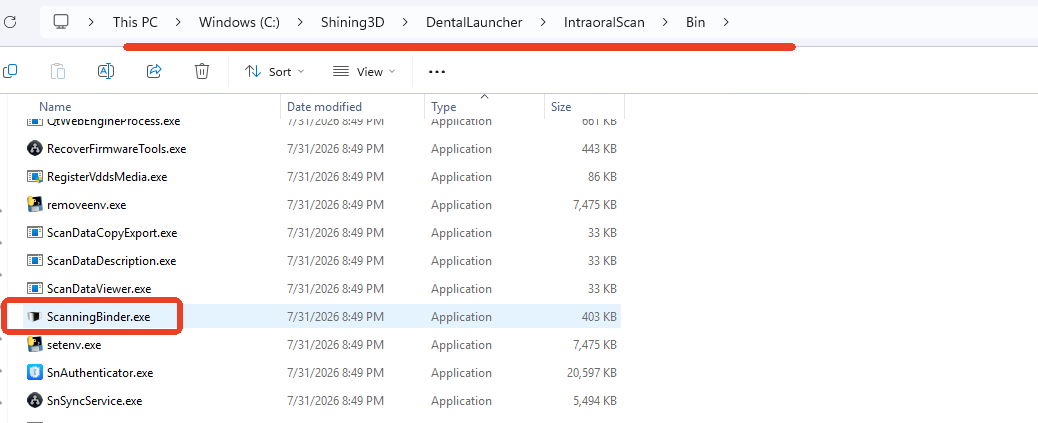
Navigate to the installation path.
"C:\Shining3D\DentalLauncher\IntraoralScan\Bin" is the default.
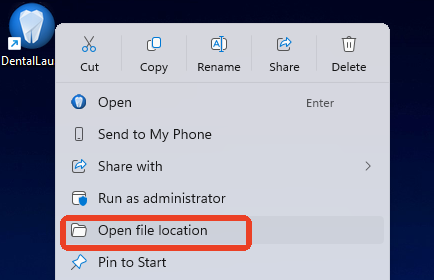
From the Desktop view, right click the DentalLauner Icon and click on "Open File Location".
Once inside the folder, look for "ScanningBinder.exe"
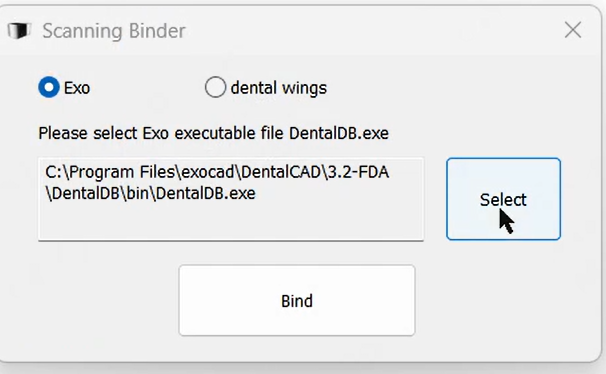
Following Window will appear, select the correct software to bind.
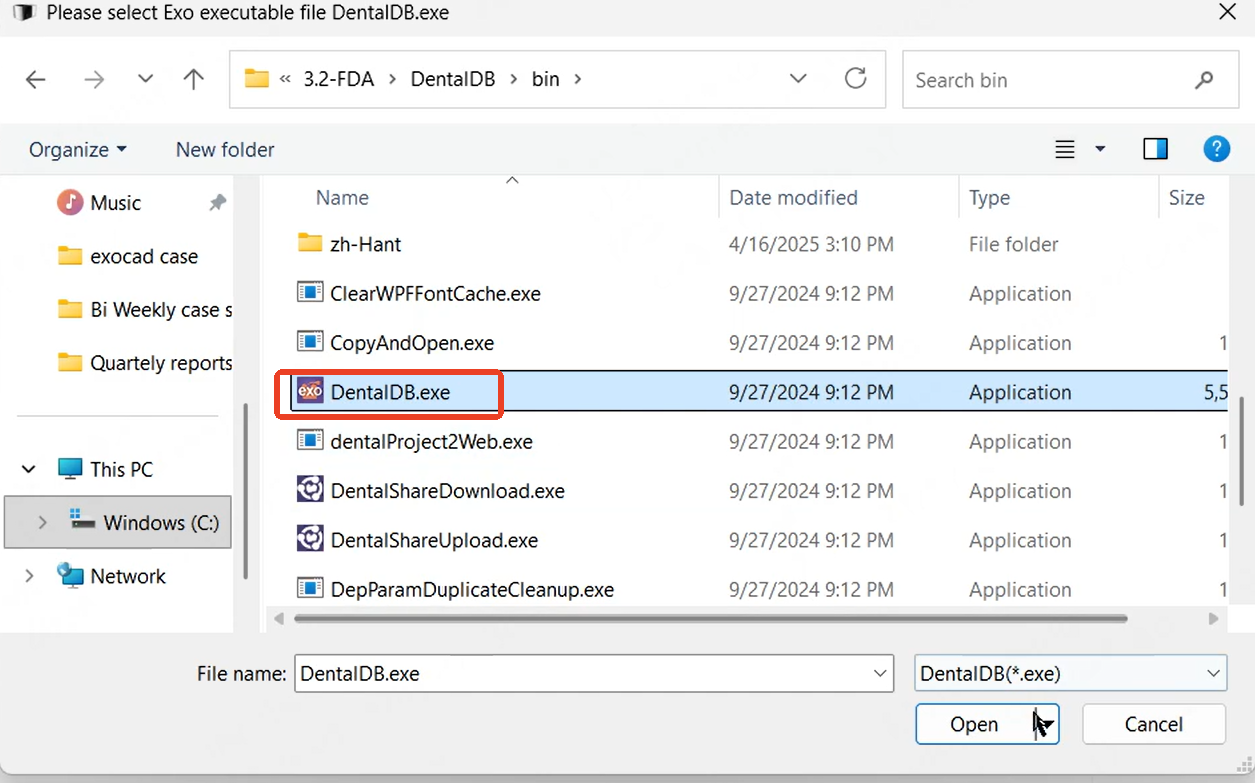
Similiar to before, click on the DentalDB icon from the Desktop if present and path will automatically fill out.

Else, find the DentalDB.exe file from the file explorer.
If multiple versions of ExoCad are installed, ensure the intended version is selected.
Verification:
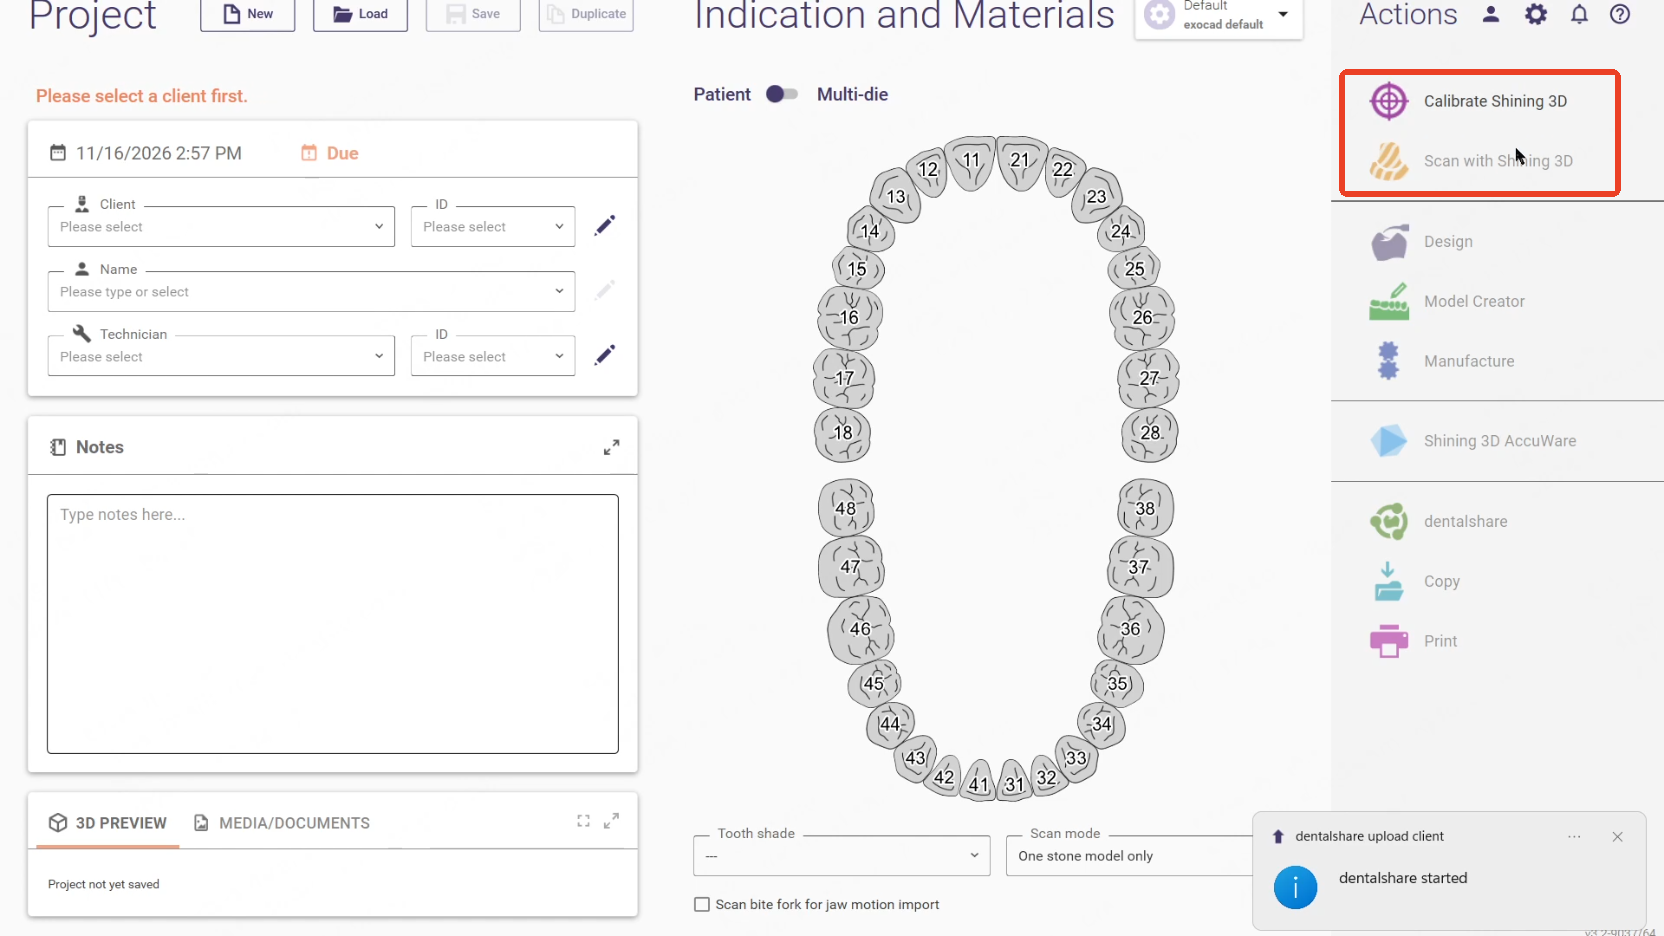
To ensure proper binding, open ExoCad and create a new case.
In the top right corner, following buttons should appear.
If they are not present, close ExoCad and reperform steps above and recheck correct version was selected.
Fill out order and attempt a test scan to ensure all steps are working properly.
Adding Exocad DentalCAD in DentalLauncher
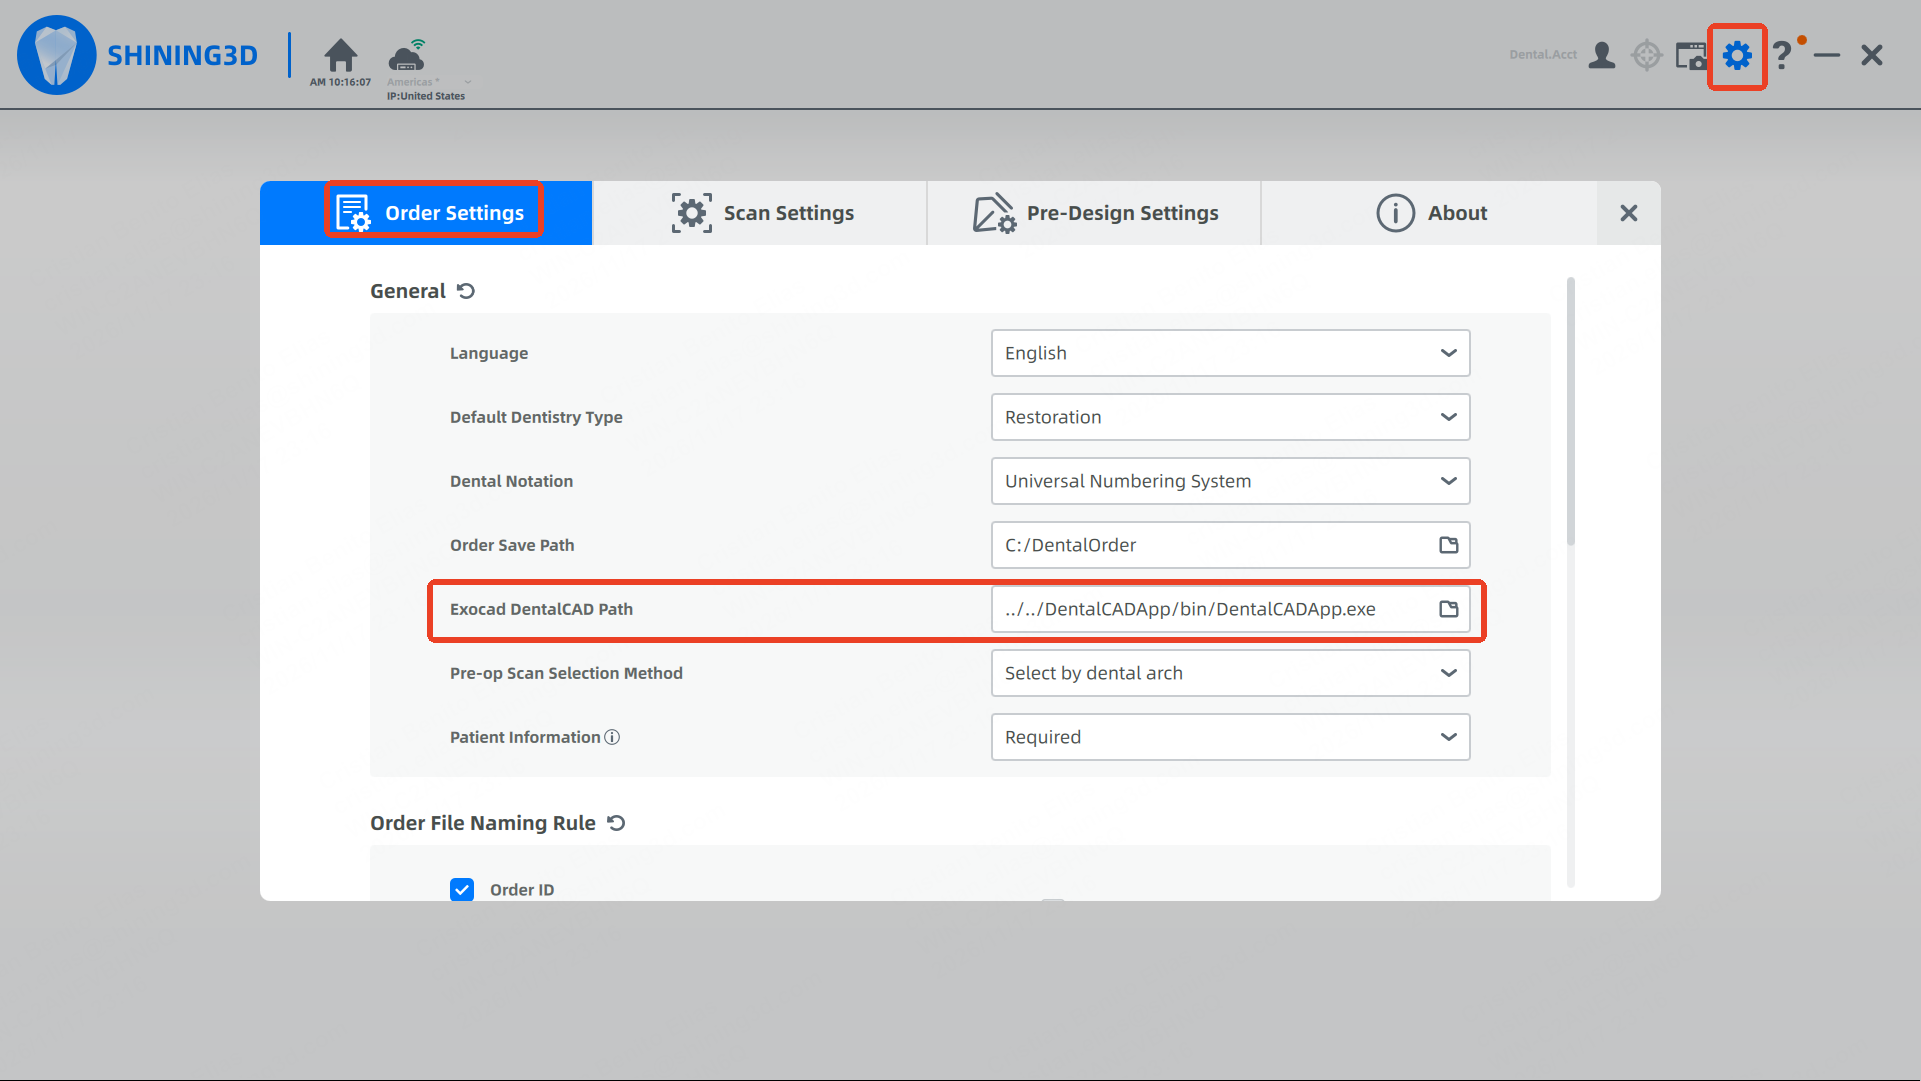
ExoCad DentalCAD can be bound from the software to use from the settings tab as well.
Click on Settings →Order Settings→Exocad DentalCAD Path
Click on the Folder Icon and locate the DentalCADApp.exe from file Explorer
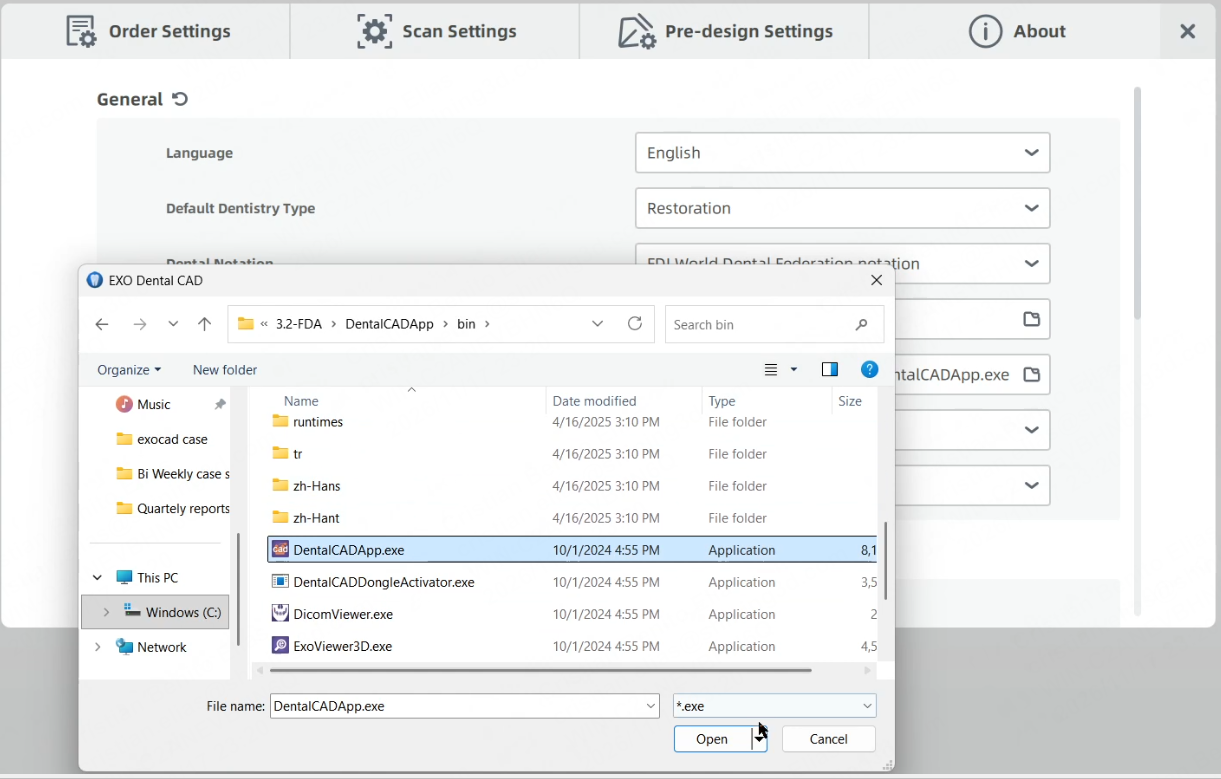
Once Binding is completed, close settings and save the changes.
DentalCad Verification
From the software in PreDesign stage, the ExoCad button should appear and when clicked, will launch the ExoCad window
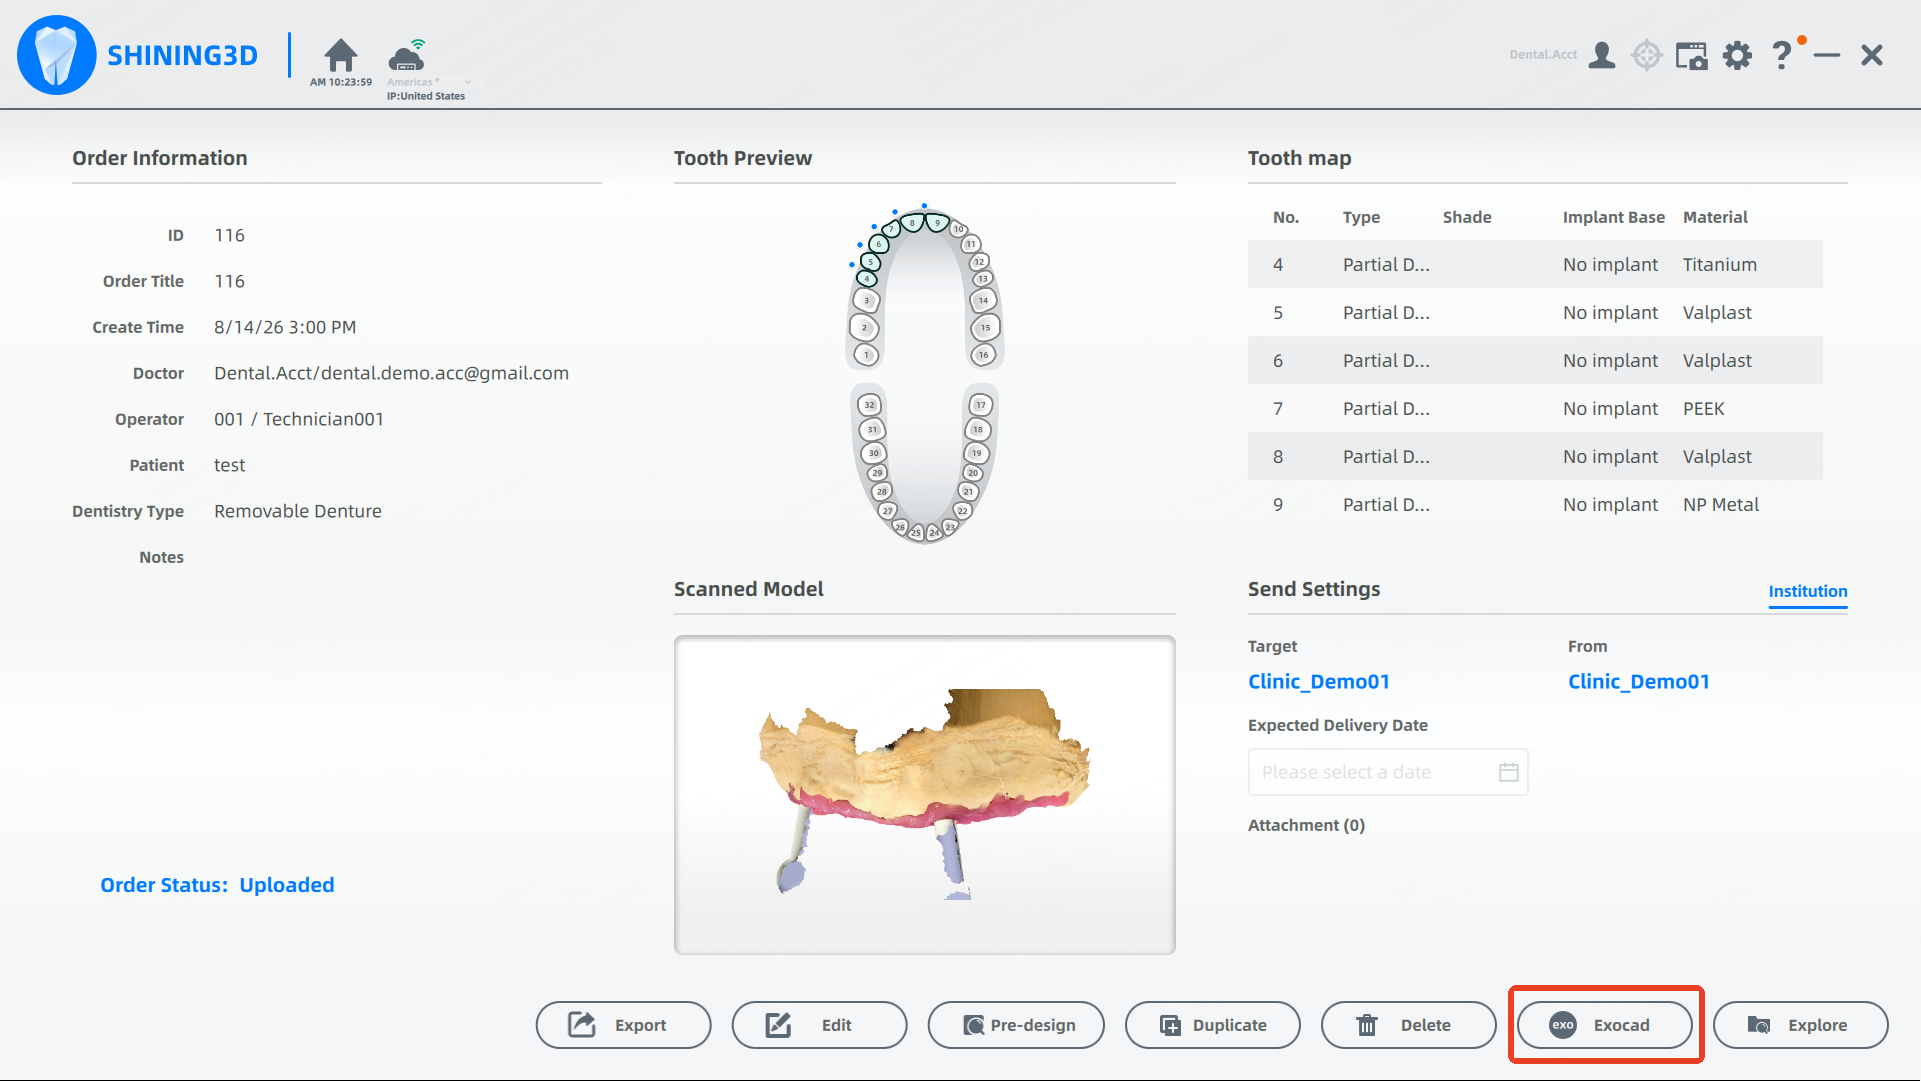
If button does not launch, reperform the above settings to ensure proper setup.