Purpose:
Guide is used for troubleshooting connection issues on MAC OS devices due to network/handshake issues and installing the FIX tool.
Scanner stops responding after restarting IntraoralScan
On affected Macs, IntraoralScan may stop detecting the scanner after you quit and reopen the software, even though the USB-C cable is still connected.
The scanner uses a virtual network connection over USB-C to communicate with IntraoralScan. When the software restarts, macOS may fail to restore the app’s access to that connection.
As a result, IntraoralScan may show the scanner as disconnected while the cable is still plugged in.
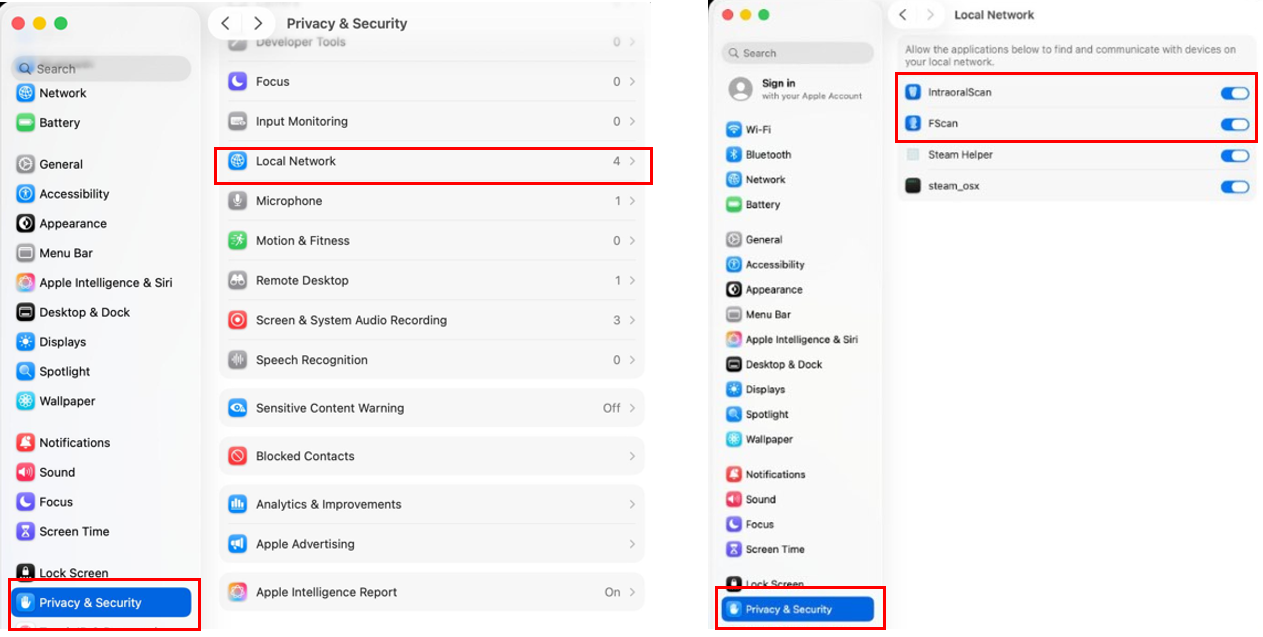
Turning Local Network access for IntraoralScan off and back on under System Settings → Privacy & Security → Local Network may restore the connection.
When the scanner is plugged into the Mac with a USB-C cable, the scanner creates a virtual Ethernet connection. macOS treats it as a local network link over the cable, so IntraoralScan needs Local Network permission to detect and communicate with the scanner. If the scanner stops appearing after you restart IntraoralScan, the SHINING 3D Fix utility helps the software regain access to that connection.
Install instructions for the FIX tool are below.
Turning Wi-Fi off and back on may also help in some cases. If the scanner still does not reconnect or the issue keeps returning, follow the troubleshooting steps below.
Check software version:
Look for a newer version of the software from the Downloads page available here.
Intraoral Scan Software Shining3D : Dental Support
Check MAC OS version by going to Settings→General section and confirm which version you are using.
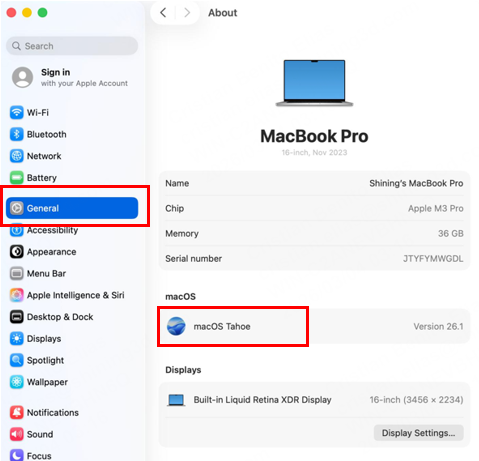
Note: Upgrading to new MAC OS version such as macOS Golden Gate (version 27) should also resolve this issue.
Method 1:
From software window.
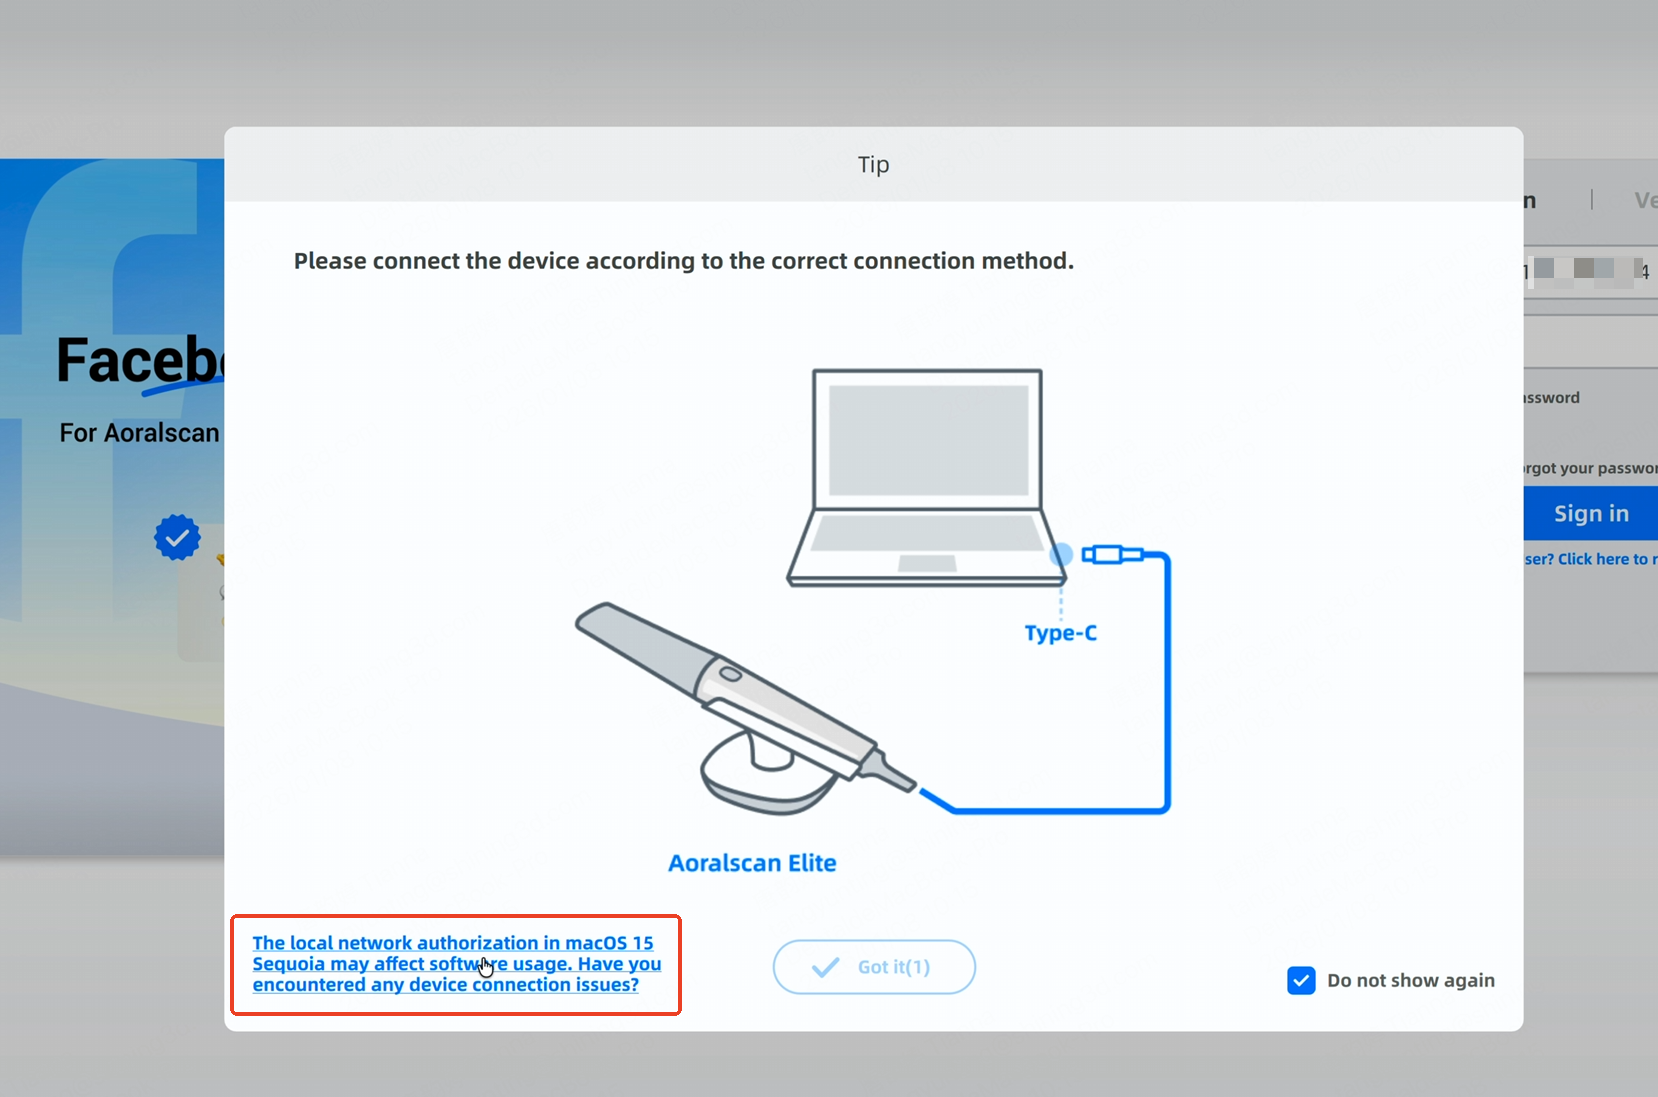
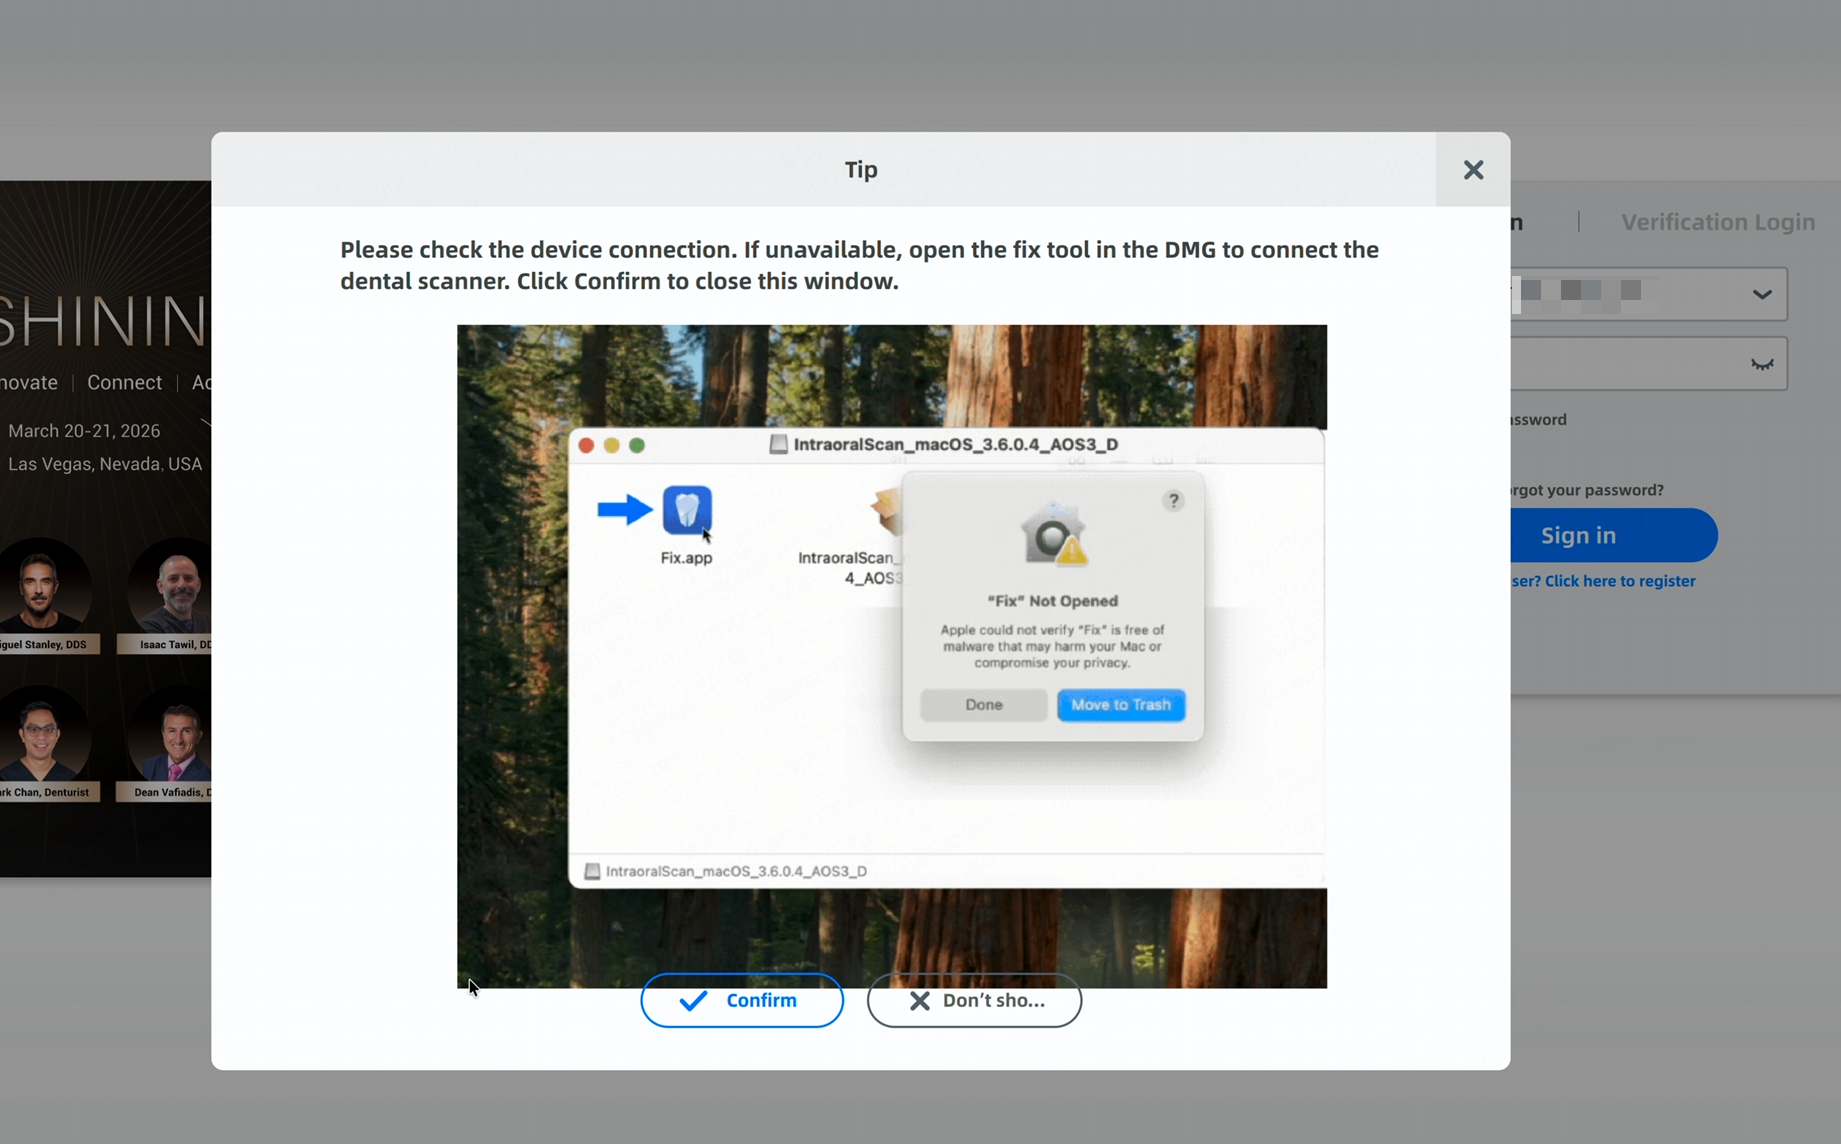
When the device type is set to Elite/Elf on the device settings screen, a corresponding prompt will appear. Clicking the prompt will display the operating instructions.
Method 2:
From the Install/DMG Package.
Once the software is downloaded, the Install and FIX file will be shown.
Install the software first followed by the FIX tool.
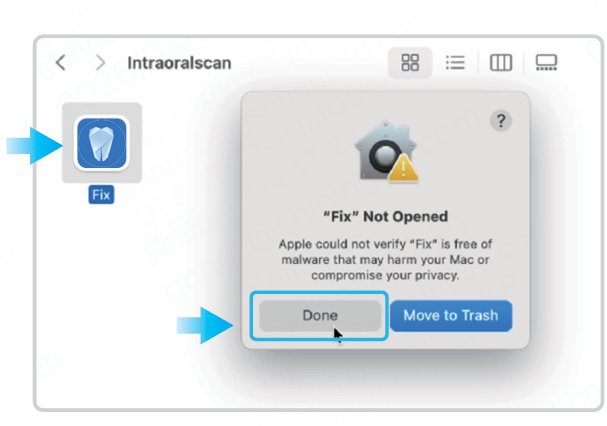
FIX Installation Instructions:
1. First, when you click “Fix” in the installation package, the system will display a message indicating that the app cannot be opened.
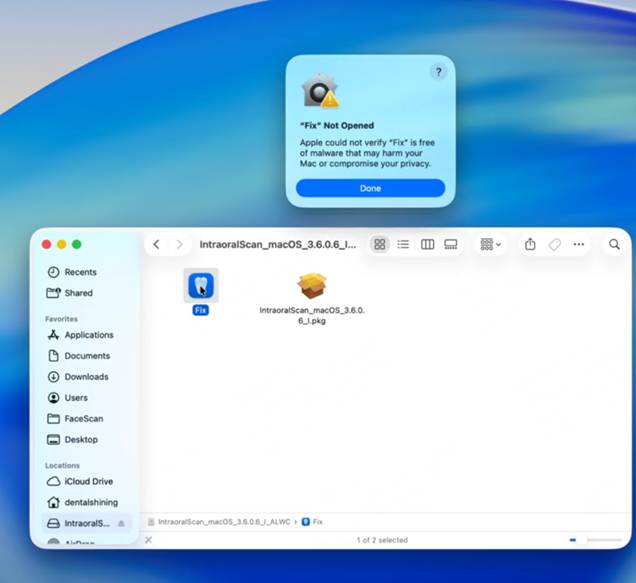
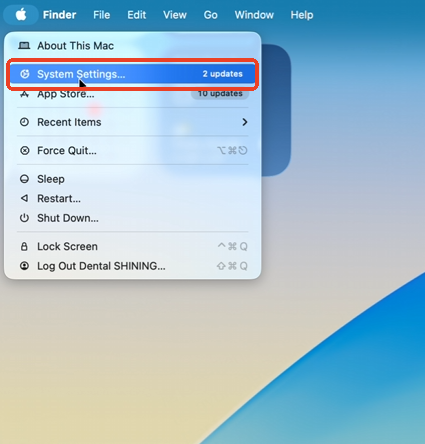
2. Click Done, then return to the desktop and open System Settings.
3. In System Settings, go to Privacy & Security, scroll down, find the message “Fix was blocked to protect your Mac”, and click Open Anyway.
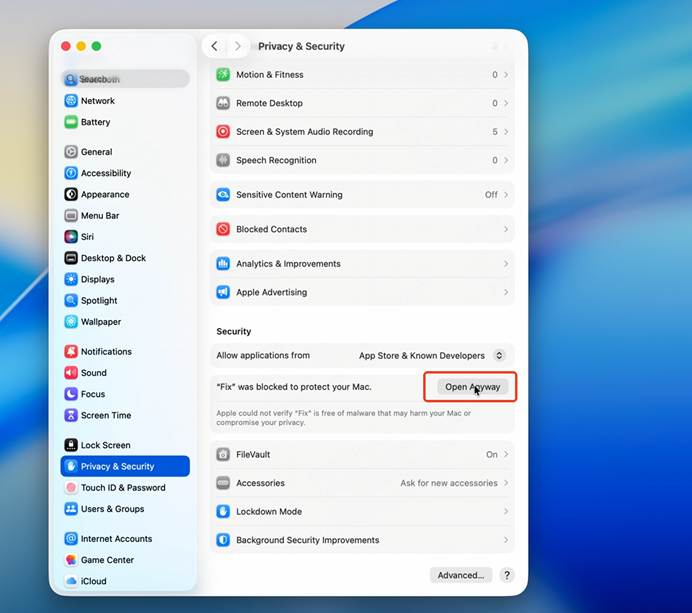
4. In the confirmation dialog that appears, click Open Anyway again and then enter your system password.
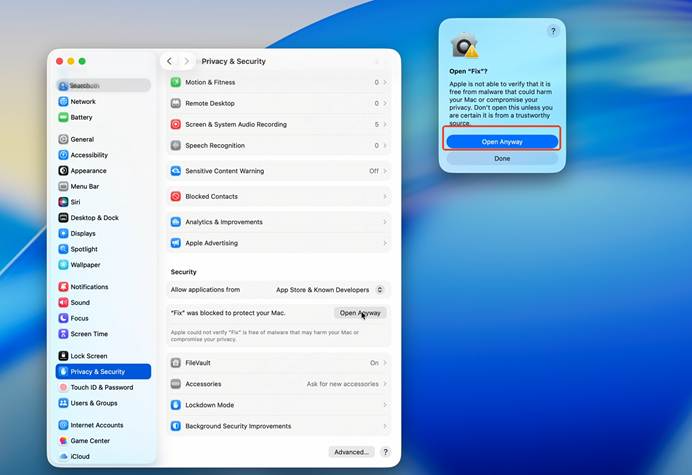
5. Click Allow. After waiting a few seconds, the app will be ready to use normally.
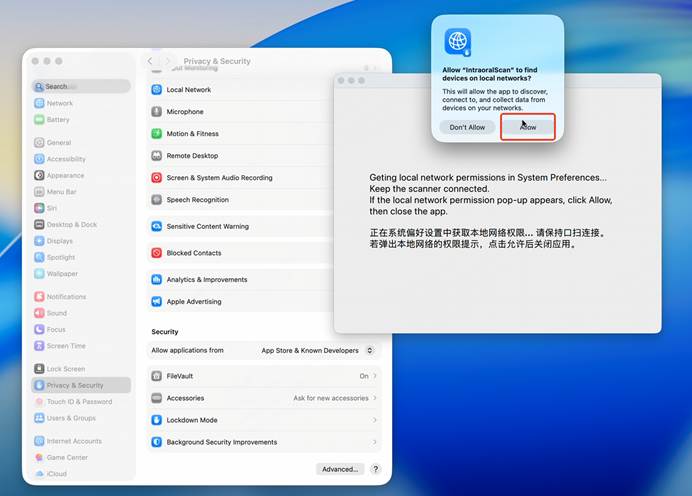
6. When software is launched again, the following dialog might appear.
Click allow to view the devices on the local network.

Location of Setting
Once the FIX is installed, the setting can be found under Local Network.
Toggle the setting OFF/ON if connection issues are present.