This process must be executed by platform Administrators when an active clinic undergoes structural transition under either of the following two scenarios:
Data Migration (Merging): Used when integrating multiple locations or consolidating redundant accounts. This process moves all active patient profiles, case histories, team members, and lab connection configurations from a legacy clinic to a designated receiving clinic without losing data history.
Institution Dissolution: Used to safely decommission/delete a dental clinic that is no longer required or was accidentally duplicated.
Key Terminology
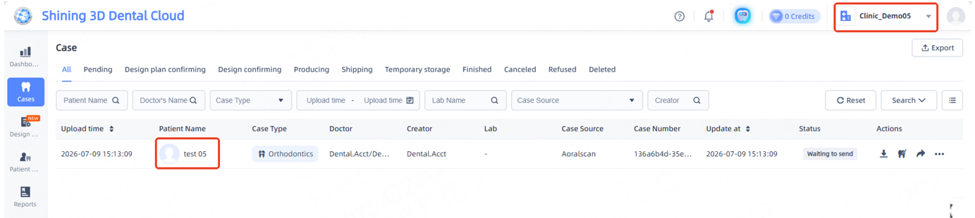
In the following scenario, Clinic 06 will be merged into Clinic 05.
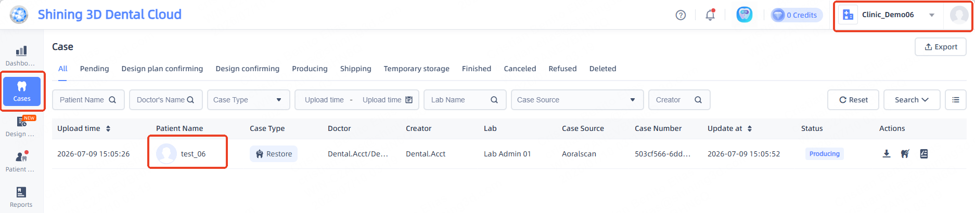
Both Clinics have one patient.
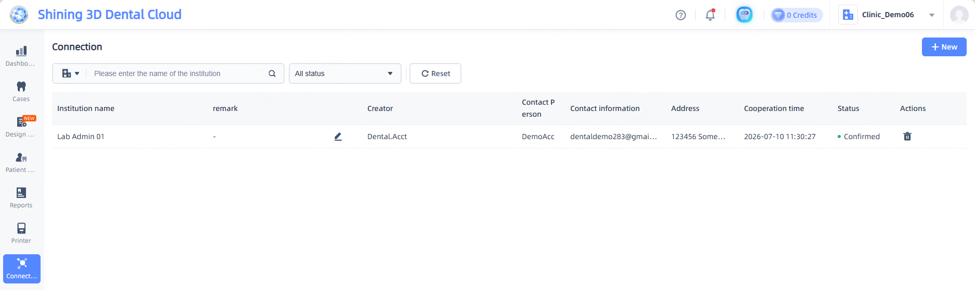
Clinic 06 has a lab connection that will be migrated.
Clinic 06:
Lab connection
Clinic 05:
Options for Migration and Dissolution of accounts are found under the Institution Tab from the cloud portal.
Ensure that the Basic Info tab is selected.
Click on the 3 dots in the upper right hand and select the appropriate option needed.
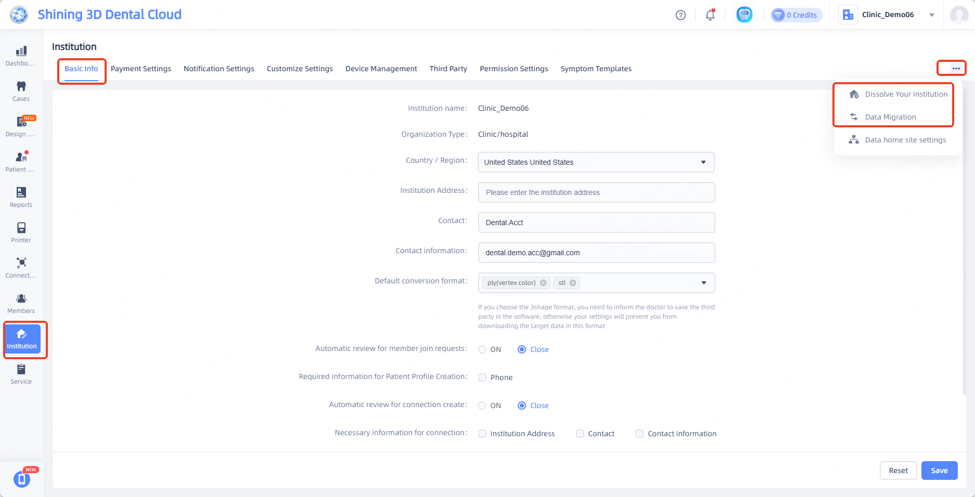
Institutional Data Migration (Consolidating/Merging)
Receiving Institution
Will provide a verification code to the Host clinic beforehand to verify that it will accept the cases.
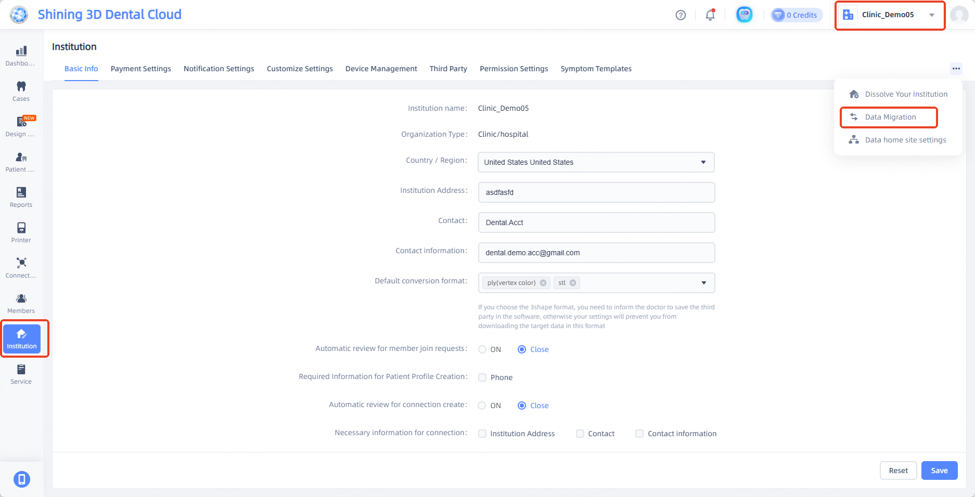
Log into the platform and ensure you are switched to the Receiving Clinic profile in the top-right menu. Click Institution on the left menu bar and verify you are on the Basic Info tab.
Click the three dots icon in the upper-right corner of the pane and select Data Migration from the dropdown options.
In the pop-up window, click the Data Reception tile.
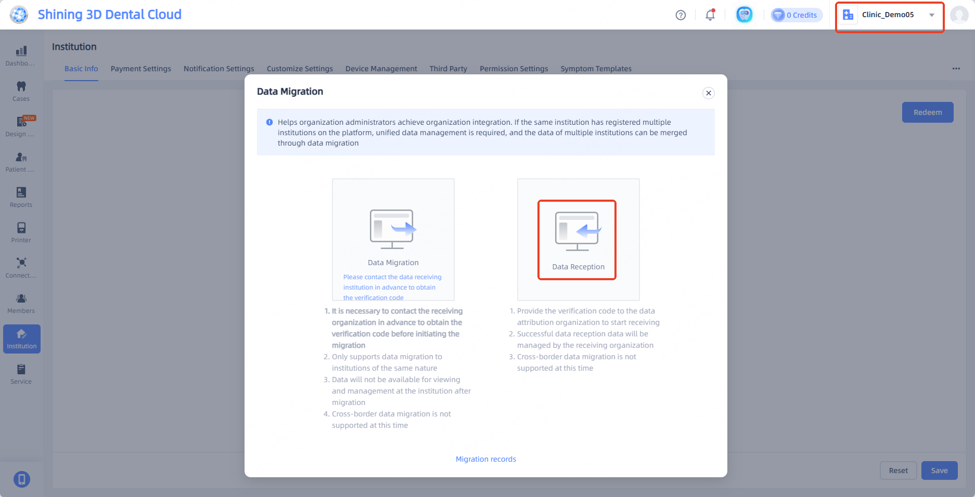
Steps
1. A Verification code will need to be sent and entered.
a. A captcha will need to be passed.
2. Search for the name of the Host Clinic, in this case Clinic Demo 06.
a. Clinic names will appear when typed.
3. Review and accept the Instructions for Data Migration.
4. A Code will be provided, make sure to note it down and send it to Receiving Clinic when ready.
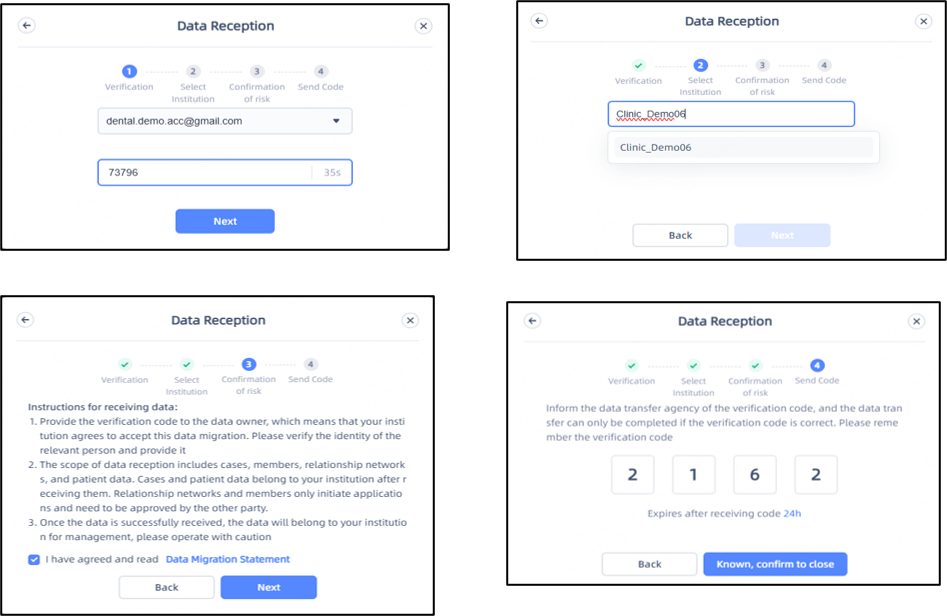
Host Clinic:
Will need to have the code from the receiving institution beforehand, if not, reach out to the institution before proceeding to the following steps.
Log into the platform and ensure you are switched to the Sending Clinic profile in the top-right menu. Click Institution on the left menu bar and verify you are on the Basic Info tab.
Click the three dots icon in the upper-right corner of the pane and select Data Migration from the dropdown options.
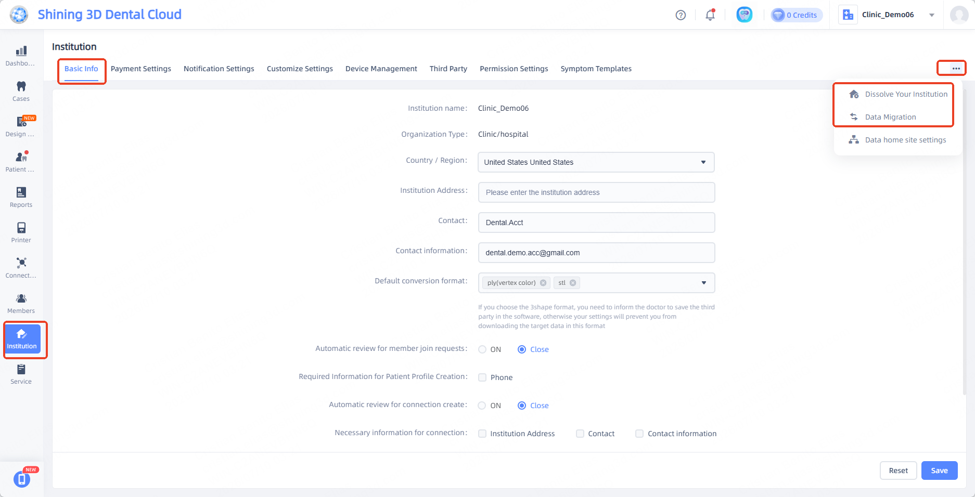
In the pop-up window, click the Data Migration tile.
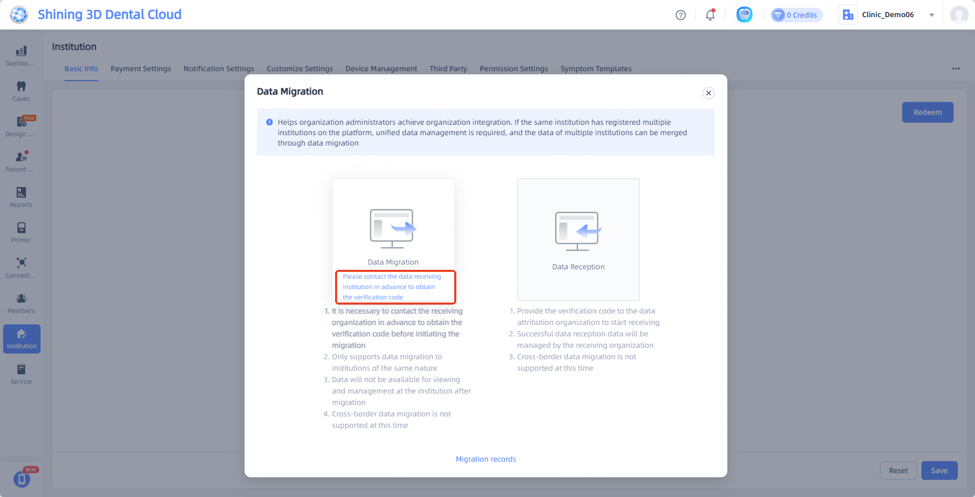
Steps
1. A Verification code will need to be sent and entered.
a. A captcha will need to be passed as well.
2. Search for the name of the Receiving Clinic, in this case Clinic Demo 05.
a. Clinic names will appear when typed.
3. Review and accept the Instructions for Data Migration.
4. Input the code provided from the Receiving Clinic.
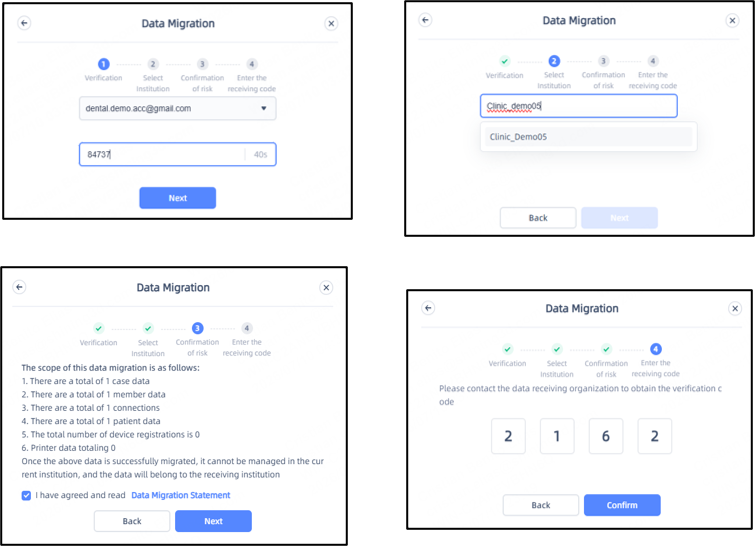
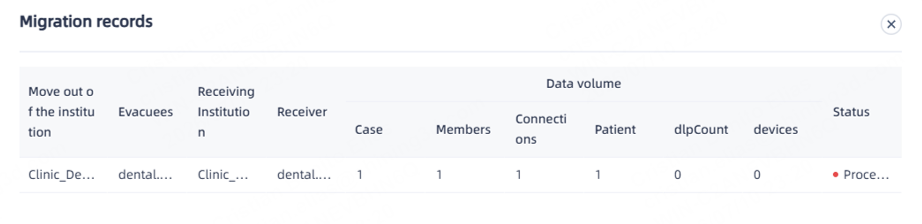
Review the Migration Records summary table carefully. This panel totals all Cases, Members, Connections, and Patients slated for transfer. Verify the data volumes match expectations.
Verification & Quality Assurance
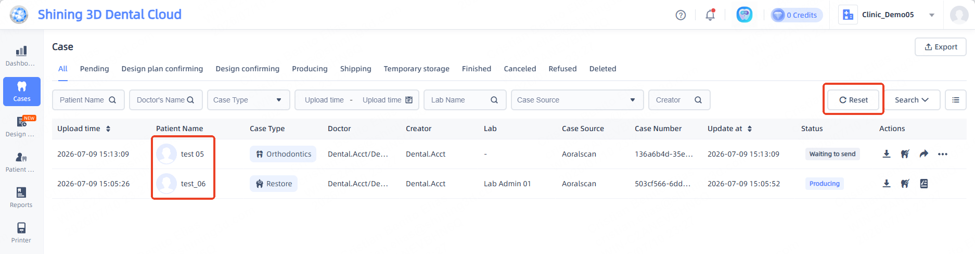
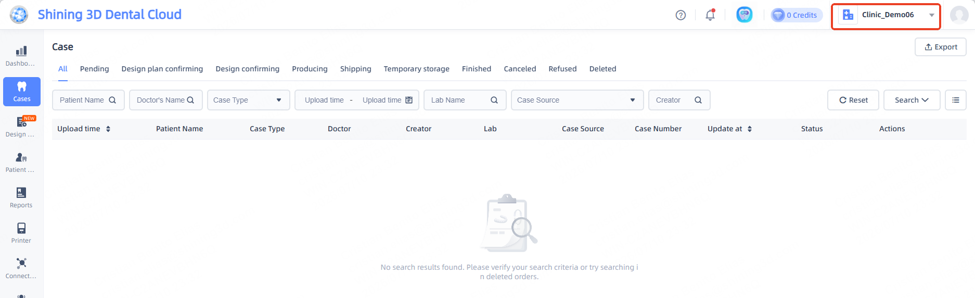
Refresh Dashboard: Log into the Receiving Clinic portal. Navigate to the Cases panel and click the Reset button to force a refresh of the dashboard.
Confirm that both original cases and migrated cases are visible.
Note on Performance: Extremely large file caches or multi-year case volumes can take some time to finalize across backend servers. It may take some time for all to migrate.
Lab Connection Re-establishment: Navigate to the Connection tab on the left panel. Migrated digital laboratory partnerships will appear in a "Waiting for..." status. The platform automatically triggers a new request to the partner laboratory on behalf of the new clinic.

Dissolution of Institution
When an Institution is no longer needed or if multiple were created, the institution can be dissolved / deleted.
Note: This is not the same as Deleting an account, only the selected institution will be deleted.
Note: Ensure any cases that are part of the Clinic have been migrated out or saved to the PC before proceeding with Dissolution steps.
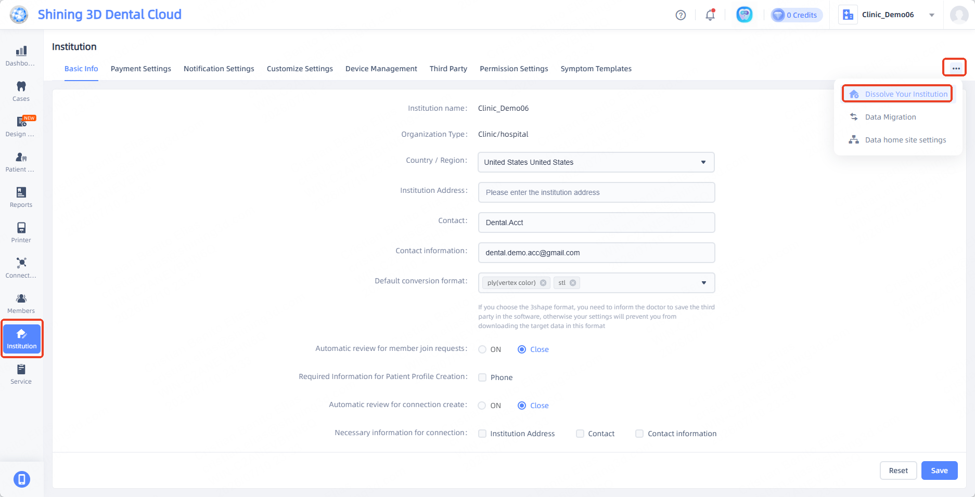
Select the target clinic to be removed. Navigate to Institution > Basic Info tab. Click the three dots menu in the top-right corner and select Dissolve Your Institution.
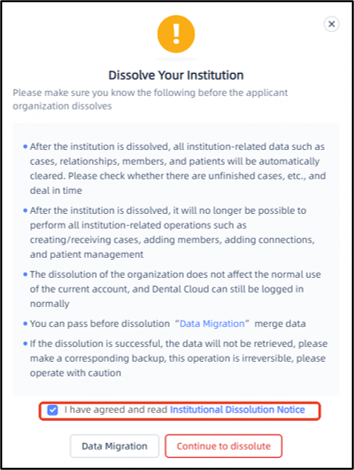
Once the confirmation dialog appears, review the provided information carefully and select Agree and Continue to Dissolve to proceed with the request.
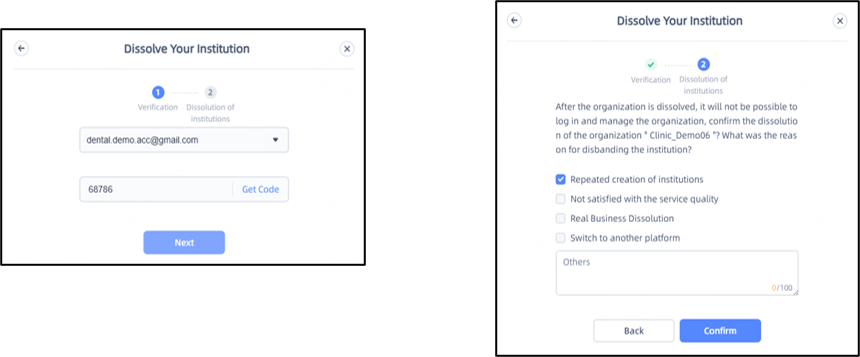
Steps
Verification: A verification code will be sent to your registered email address.
Reason Selection: Select the reason for dissolving the institution from the provided menu.
Confirmation: Click 'Confirm' to finalize and submit the dissolution request.
Upon submission, a notification will confirm that the institution is scheduled for dissolution within 72 hours. This request may be revoked at any time during this grace period. Once the 72-hour window expires, the institution will be permanently decommissioned and will no longer be accessible.

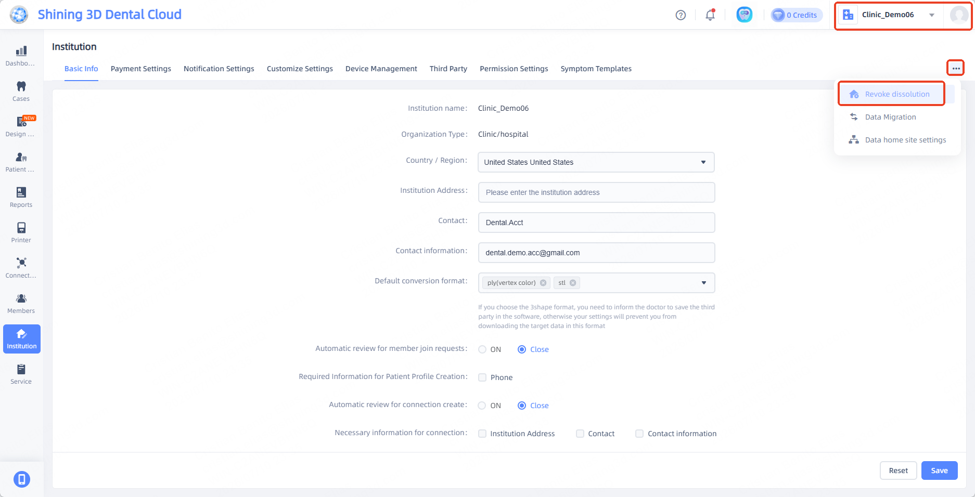
If the dissolution request needs to be revoked, navigate to the Institution tab and select the three dots (more options) icon in the upper-right corner.
Select Revoke Dissolution.
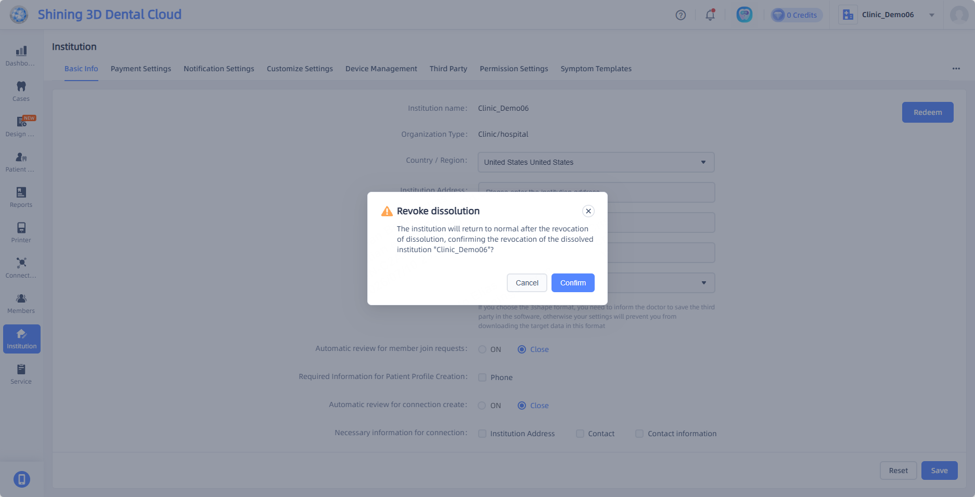
Review the details and confirm the withdrawal of the request.
Once completed, the institution will be restored to its active status.