
AI Design Review and Adjustment
Step 1: Review the AI Design
• Review the AI-generated restoration in the Section view.
• Inspect the marginal fit, occlusal clearance, and approximal contact. Rotate, pan, or zoom the model to evaluate the restoration from different angles.
• Adjust the section plane as needed to inspect the internal fit. You can also use the measurement tool to perform custom distance measurements.
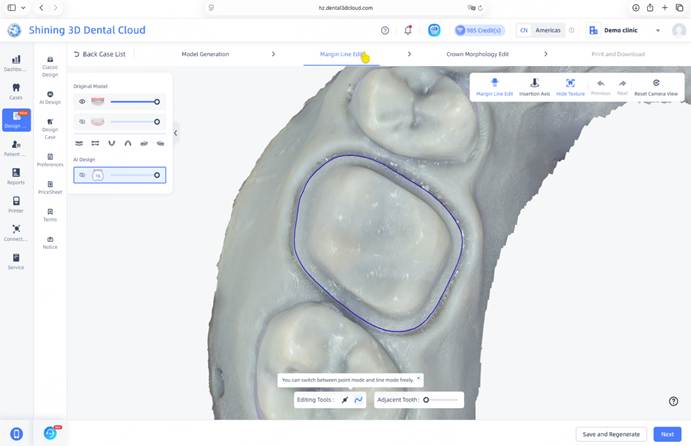
Step 2: Edit the Margin Line (Optional)
• If necessary, click Margin Line Edit to enter the editing mode.
• Review the automatically generated margin line and adjust it as needed using Point Mode or Line Mode. Rotate, pan, and zoom the model to ensure the margin line accurately follows the preparation finish line.
• Use the Adjacent Tooth slider to adjust the visibility of neighboring teeth for a clearer view of the margin area.
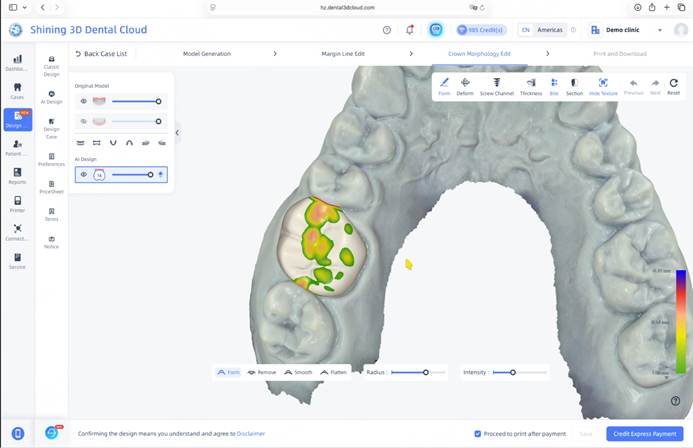
Step 3: Edit Crown Morphology (Optional)
• If necessary, click Crown Morphology Edit to refine the AI-generated restoration.
• Use the available editing tools to adjust the crown morphology, including Form, Deform, Smooth, Flatten, and Remove, to optimize the occlusal anatomy and overall shape.
• Enable the Bite, Thickness, or Section view to evaluate the occlusal contact, restoration thickness, and internal fit during editing.
• Adjust the Radius and Intensity parameters to control the editing range and effect.
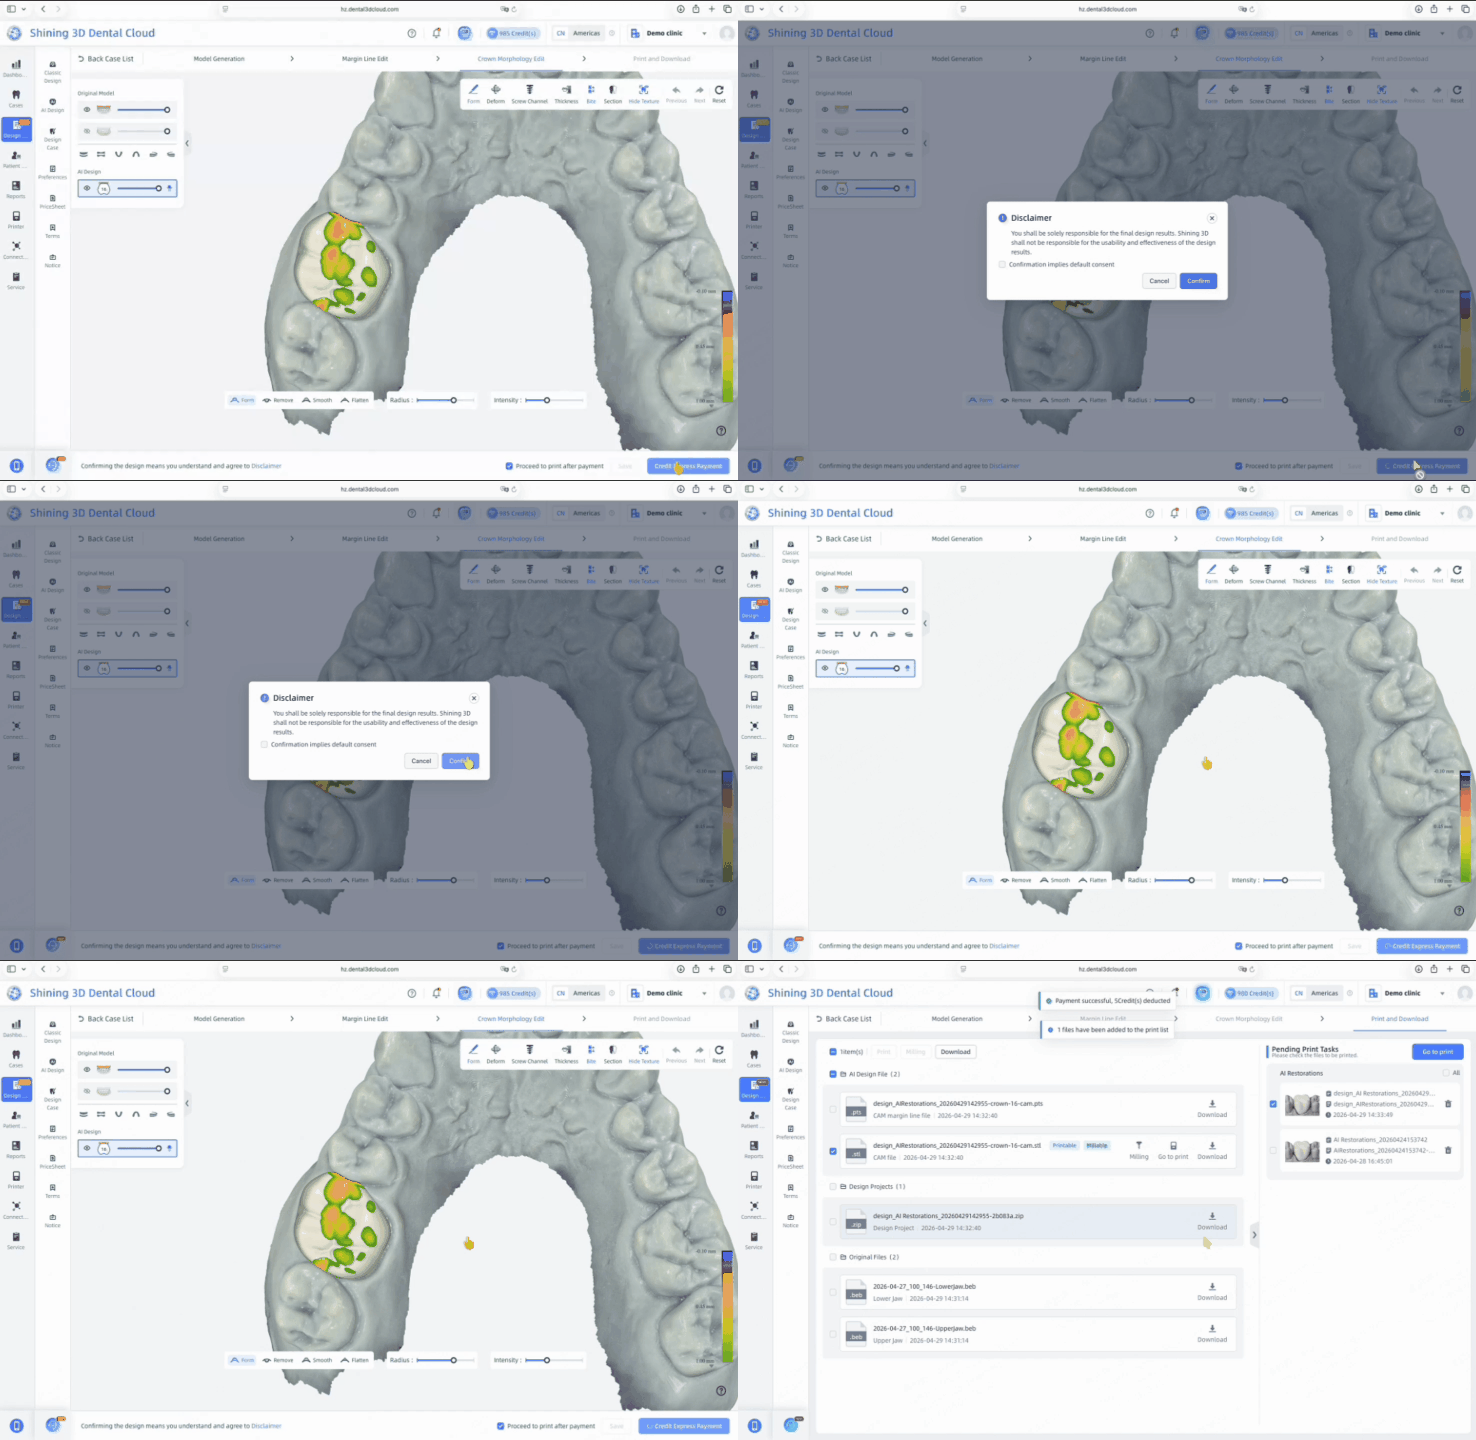
Step 4: Confirm and Payment
• Review the final restoration design to ensure it meets your clinical requirements.
• If you are satisfied with the result, click Credit Express Payment to complete the payment.
Once the payment is successful, the final restoration design will be generated and will be available for download or printing.