
Aoralscan ELF - Quick Reference Guide
HARDWARE SETUP, INSTALLATION & CALIBRATION
1. Hardware Setup & System Requirements
System Prerequisites:
Windows OS: Intel Core i7 / 16GB+ RAM / NVIDIA RTX 3060 or higher GPU. DO-NOT-USE: RTX 3050, 4050, and RTX 5050 series
macOS: Apple M2 or newer / 16GB+ RAM / macOS 13.0+. MacBook Air is not recommended due to the lack of a cooling system
*Important* Please click this link for specific PC requirements for Windows and MAC laptops -https://support.shining3ddental.com/en/support/solutions/articles/60000698979
Power Supply Warning: Connect laptop to an AC wall outlet to prevent GPU/CPU performance throttling during scanning.
Scanner Connection:
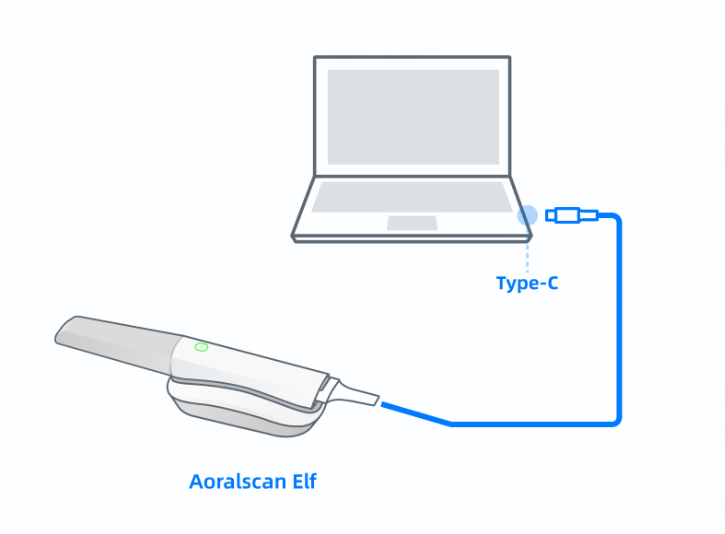
Plug scanner directly into a Thunderbolt / USB Type-C port (marked with ⚡).
Do NOT use USB hubs, adapters, or extension cables (the scanner requires a stable 15W power supply).
2. Software Installation & PC Optimization
Windows Installation & Optimization
Download the Dental Launcher Software - https://support.shining3ddental.com/en/support/solutions/articles/60000706166-download-the-intraoralscan
Run QuickInstaller_IntraoralScanXXXX.exe as Administrator.
Open NVIDIA Control Panel > Manage 3D Settings > set Preferred graphics processor to "High-performance NVIDIA processor".
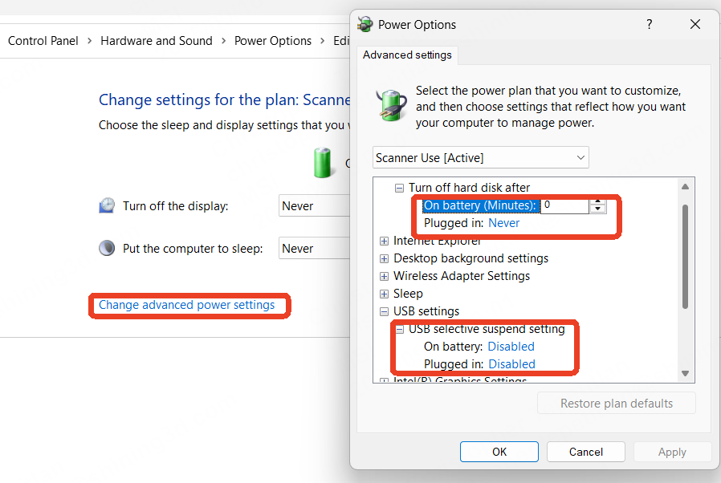
Open Windows Power Options and configure a high-performance plan:
System sleep & display turn-off timeouts: Never
PCI Express Link State Power Management: Off
Minimum Processor State: 100%
5. Apply Windows updates
6. Uninstall antivirus software
7. Turn off Windows firewalls
macOS Installation & Permissions
Download the Dental Launcher Software - https://support.shining3ddental.com/en/support/solutions/articles/60000706166-download-the-intraoralscan
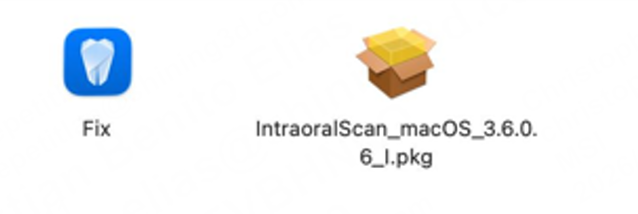
Run IntraoralScan_macOS_XXXX.pkg installer package.
Run the bundled Fix tool.
Open System Settings > Privacy & Security > Local Network and grant permission for IntraoralScan.
3. Scanner Calibration Protocol
Connect the calibration block to the computer using the provided USB A-to-A cable.
Remove the scanner tip and insert the scanner body completely flush into the calibrator unit.
Verify that both the top calibrator LED and the scanner indicator ring show solid green.
Open software and click Start Calibration (process takes 2–4 minutes).
Quick Diagnostic Checklist
1. Power & Cable Connections

Laptop connected to AC wall outlet.

Scanner plugged directly into Thunderbolt/Type-C port without adapters or hubs.
2. LED Status Diagnostics & Lens Maintenance
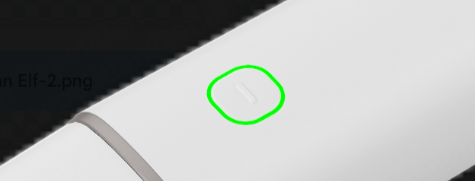
Steady Green: Normal operation / system ready.
Breathing Green: Standby mode (tip heating active).
Steady Orange / Yellow: Abnormal status, dust cap attached, or unrecognized/detached tip.
Fix: Remove protective dust cap. If cap is off, detach tip, realign correctly, and push firmly until seated flush into the scanner body.
Optical Lens Inspection:
Check optical lens for smudges or debris. Clean gently with a lint-free wipe and approved optical cleaner.
Inspect for physical cracks or scratches. Replace tip immediately if damaged.
3. Resolving Calibration Failures

Verify USB power cable is securely connected to the calibrator block (top LED illuminated).

Confirm scanner body is seated fully and flush into the calibrator housing.

Reseat connections and restart calibration protocol in software.
4. MAC Software & Network Resets

Reboot computer to clear cached memory and stalled macOS background threads.

Toggle Local Network permission for IntraoralScan OFF and then ON in macOS System Settings.

Re-execute software installer package (.exe / .pkg) and re-apply the Fix patch.
Escalation & Technical Support
If issue remains unresolved after performing Level 1 troubleshooting steps, contact Shining 3D Technical Support:

Shining 3D Support Center