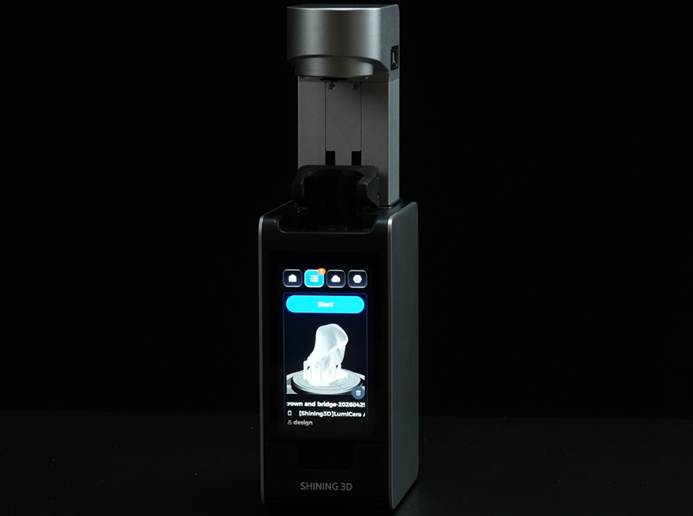
Cloud Print is a cloud-based printing workflow integrated with SHINING 3D Dental Cloud. It enables users to import restoration designs directly from AI Design cases or local files, perform cloud-based slicing, and send print jobs to a bound SHINING 3D printer remotely.
Before creating a print job, make sure your printer has been activated, bound to your Dental Cloud account, and is online.
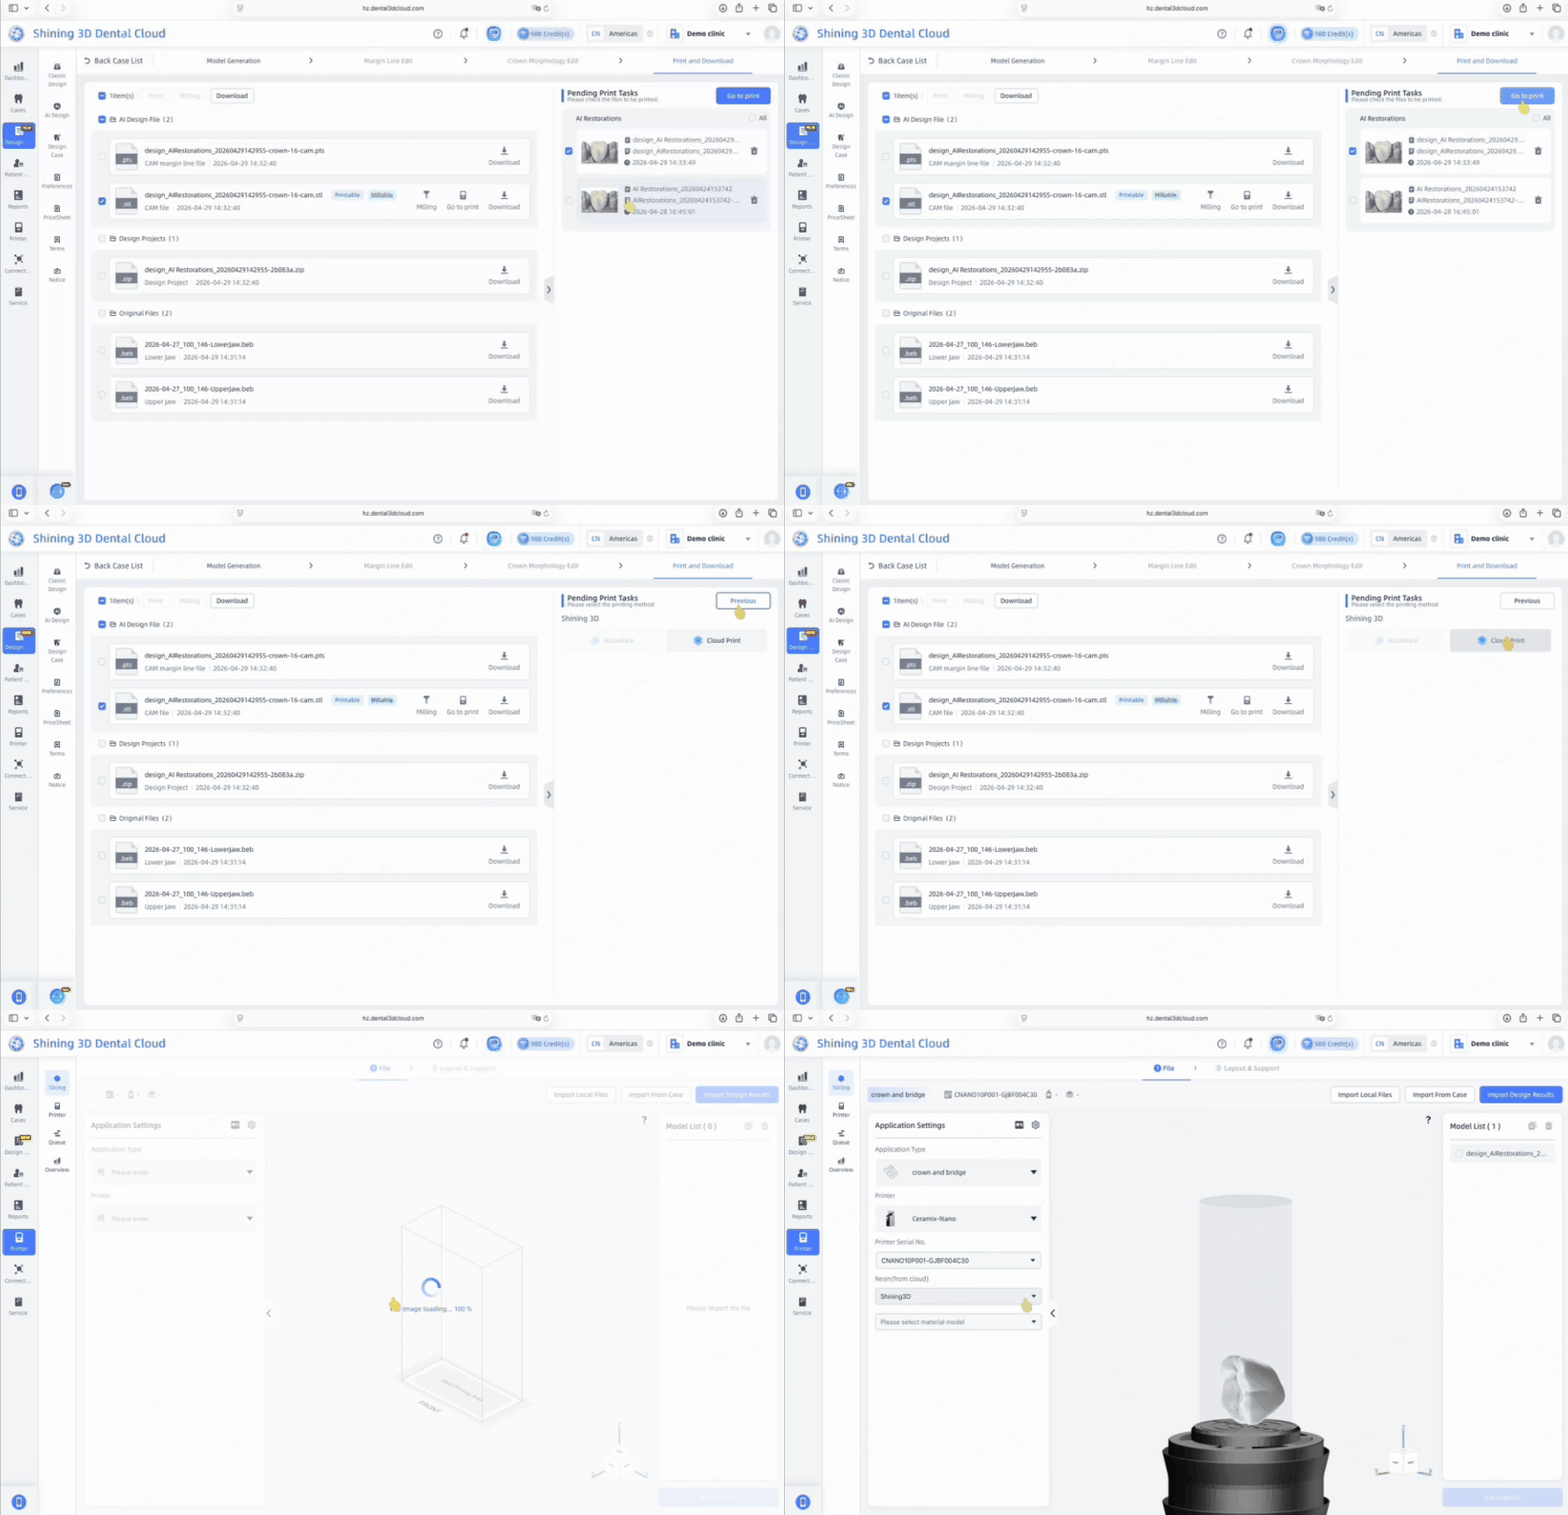
Step 1: Import the Design Results
• Open the Print and Download page of the completed AI Design case.
• Select the restoration(s) to be printed from the Pending Print Tasks list, then click Go to Print to import the design results into the Cloud Print workspace.
• The printable restoration model will be loaded automatically and is ready for slicing.
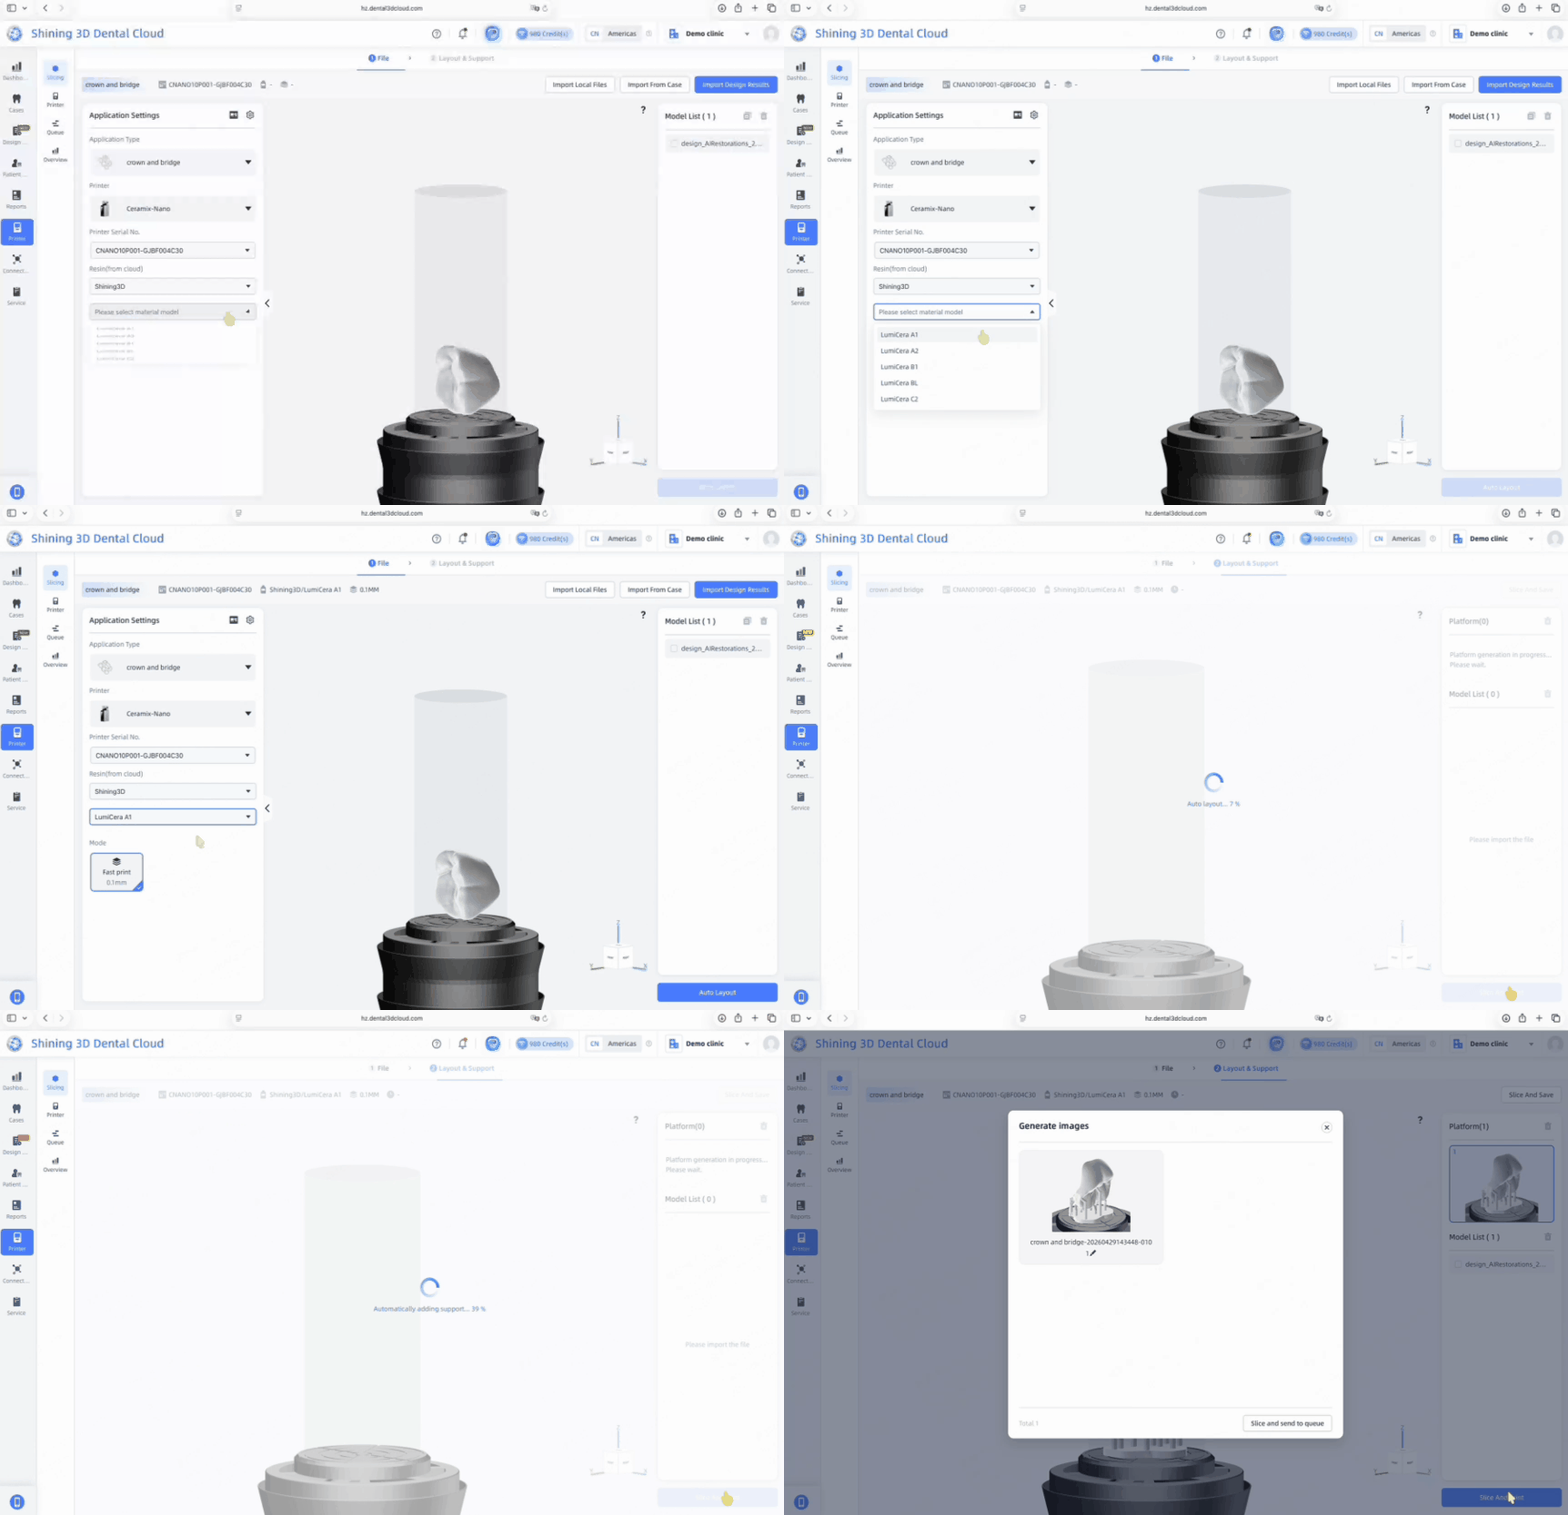
Step 2: Configure the Print Settings
• Based on the selected AI design type and the bound printer, the cloud platform automatically configures the corresponding Application Type and Printer.
• Before slicing, verify that the Application Type, Printer, and Printer Serial Number are correct. If multiple applications or printers are available, you can manually select the desired option from the drop-down list.
• Select the Resin from the cloud material library and confirm that the correct Material Model is selected.
Note: If the selected material is incorrect, or if you intend to print using a capsule resin with different material parameters, select the correct Resin and Material Model, then re-slice the model before printing.
• After confirming all print settings, click Auto Layout. The system will automatically arrange the model on the build platform and generate the necessary supports.
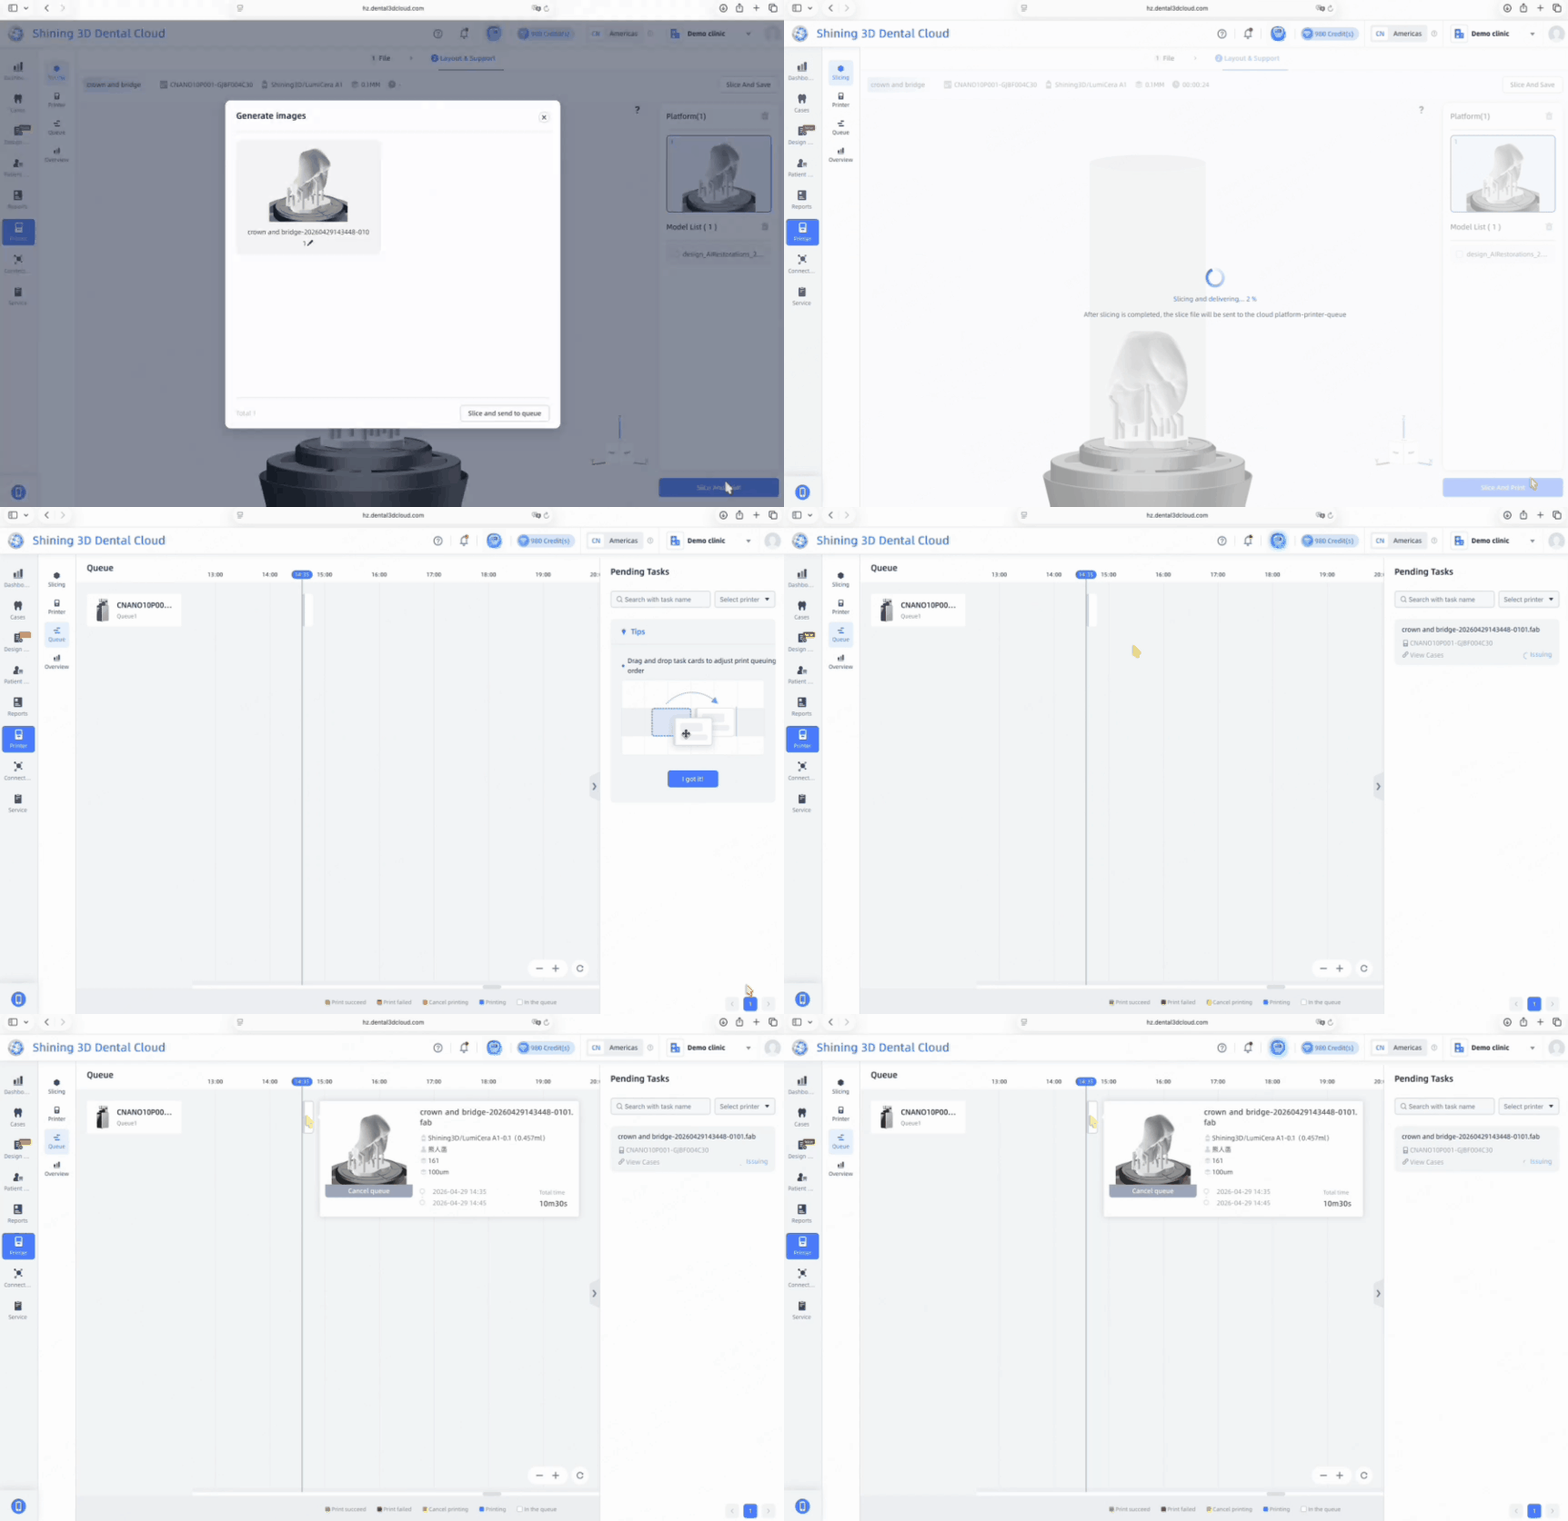
Step 3: Slice and Send to the Queue
• After the model layout and support generation are complete, click Slice and Send to the Queue to slice the model and generate the print file.
• Once slicing is complete, the print job will be automatically sent to the selected printer and added to the print queue. You can monitor the task status, printing progress, and estimated print time from the Queue page in SHINING 3D Dental Cloud.
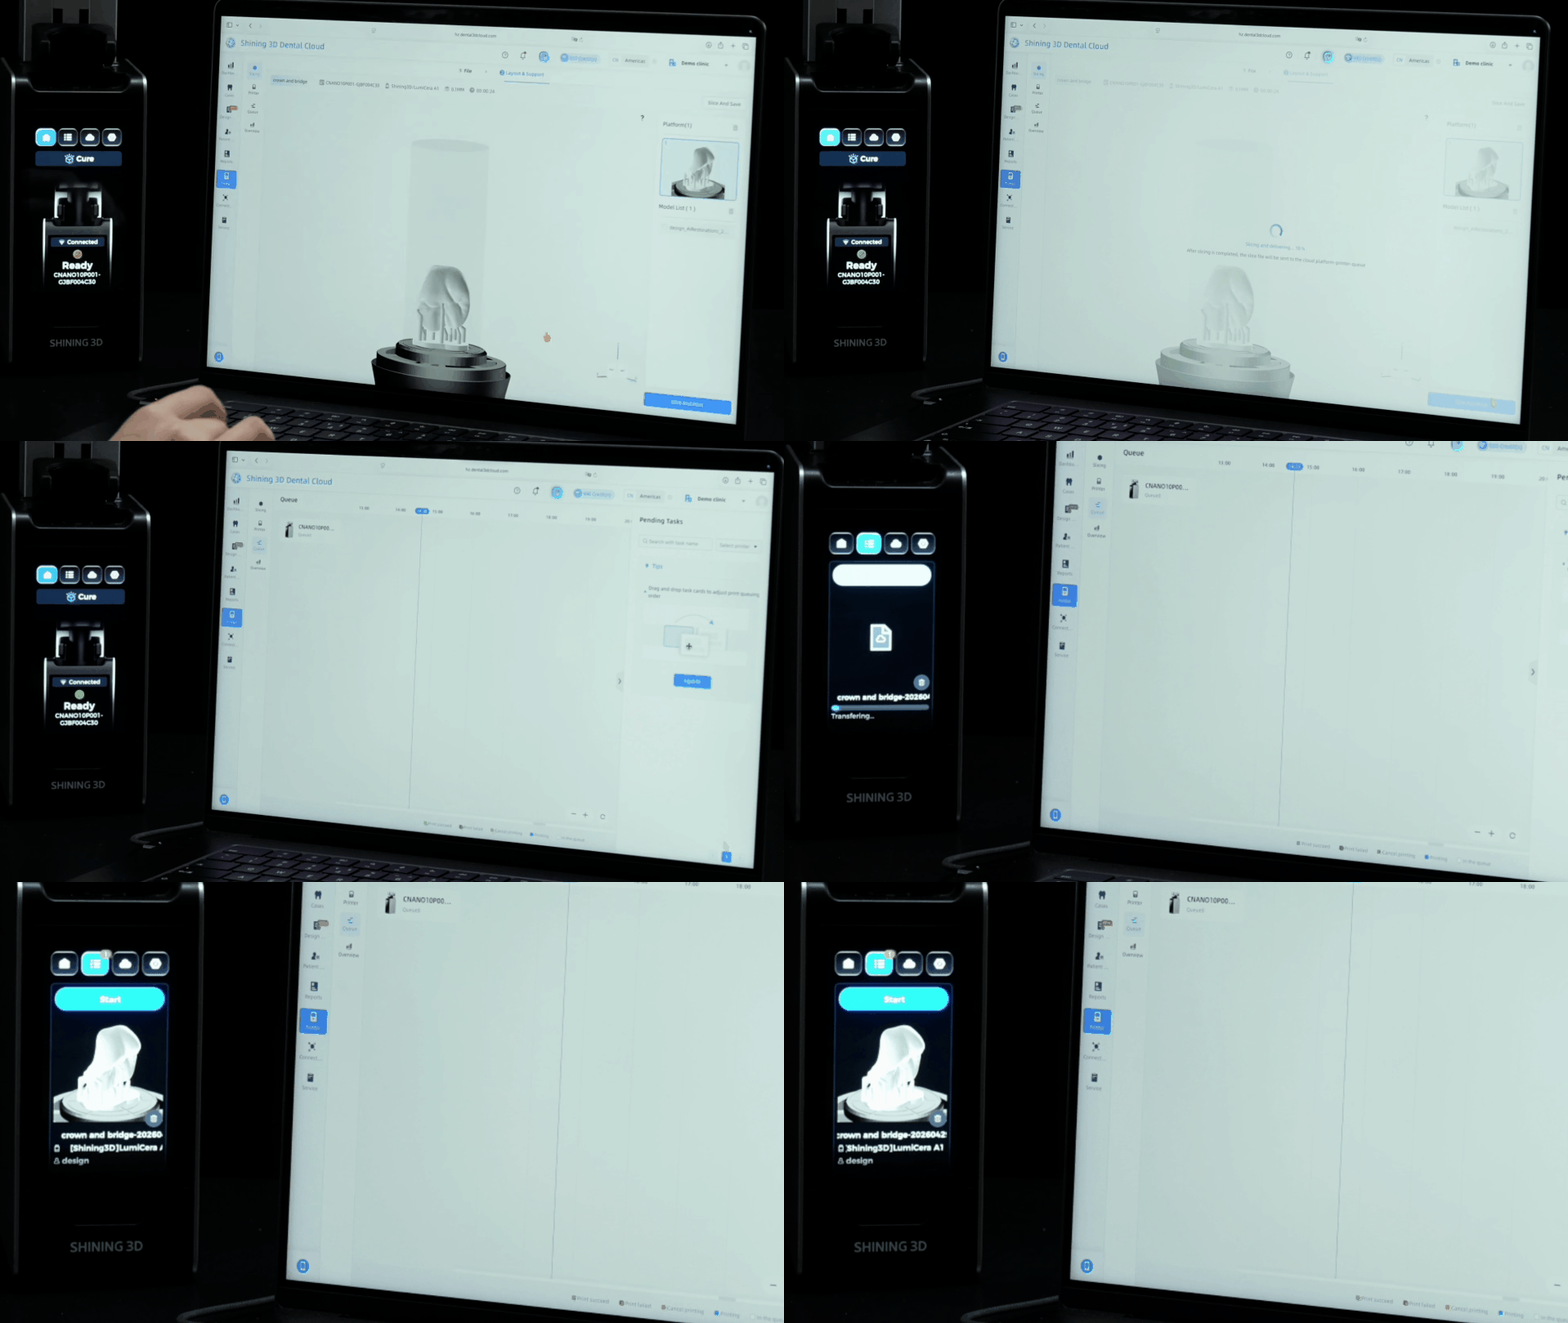
Step 4: Printer Queue
• After slicing is complete, the print job is automatically transmitted to the printer through the cloud platform and added to the Queue.
• On the printer touchscreen, verify that the print job has been successfully received and appears in the Queue.