What is a user role in Shining3D account?
A user role is a collection of permissions to access Dental Cloud services that will be applicable to all the users who are assigned this role.
Types of roles
Institutions including clinic and Lab have four predefined roles that can be assigned to a user account:
- Clinic admin
- Clinic member
- Lab admin
- Lab member
The dental cloud will display a different menu based on the user role as shown below.

Permissions
User roles give administrators (admin role) the ability to control what members (member role) can do in the Dental Cloud. A Role is a collection of Permissions which is based on job functions such as administrators, dentist, designer and other staff. Permissions are assigned to Roles and Roles are assigned to Users.
| Clinic admin and Clinic member | ||||
| Permissions |  |  | ||
 | Request a connection with a lab | Yes | No | |
| Delete a connection | Yes | No | ||
| use a connection | All connections | All connections | ||
 | Create a new patient | Yes | Yes | |
| View, use and modify a patient's information | For all patient | only patient information created by this member | ||
 | Invite a user | Yes | No | |
| Accept an application | Yes | No | ||
| Role Assignment | 1.Assign an admin role to a member 2.Change an admin role into member role | No | ||
| Delete a member(role) | Yes (Both admin and member role) | No | ||
| Member list | All members | No | ||
 | View and download cases | All members | only cases created by this member | |
| Withdraw orders | All members | only cases created by this member | ||
| Clinic admin and Clinic member | ||||
| Permissions |  |  | ||
| Accept an application | Yes | No | |
| Delete a connection | Yes | No | ||
| use a connection | All connections | All connections | ||
| Invite a user | Yes | No | |
| Accept an application | Yes | No | ||
| Role Assignment | 1.Assign an admin role to a member 2.Change an admin role into member role | No | ||
| Delete n member(role) | Yes (Both admin and member role) | No | ||
| Member list | All members | No | ||
| View and download cases | Cases of all members | Cases of all members (Could be set by admin) | |
| Accept orders | Cases of all members | Cases of all members | ||
| Data assessment | Yes | No (Could be set by admin ) | ||
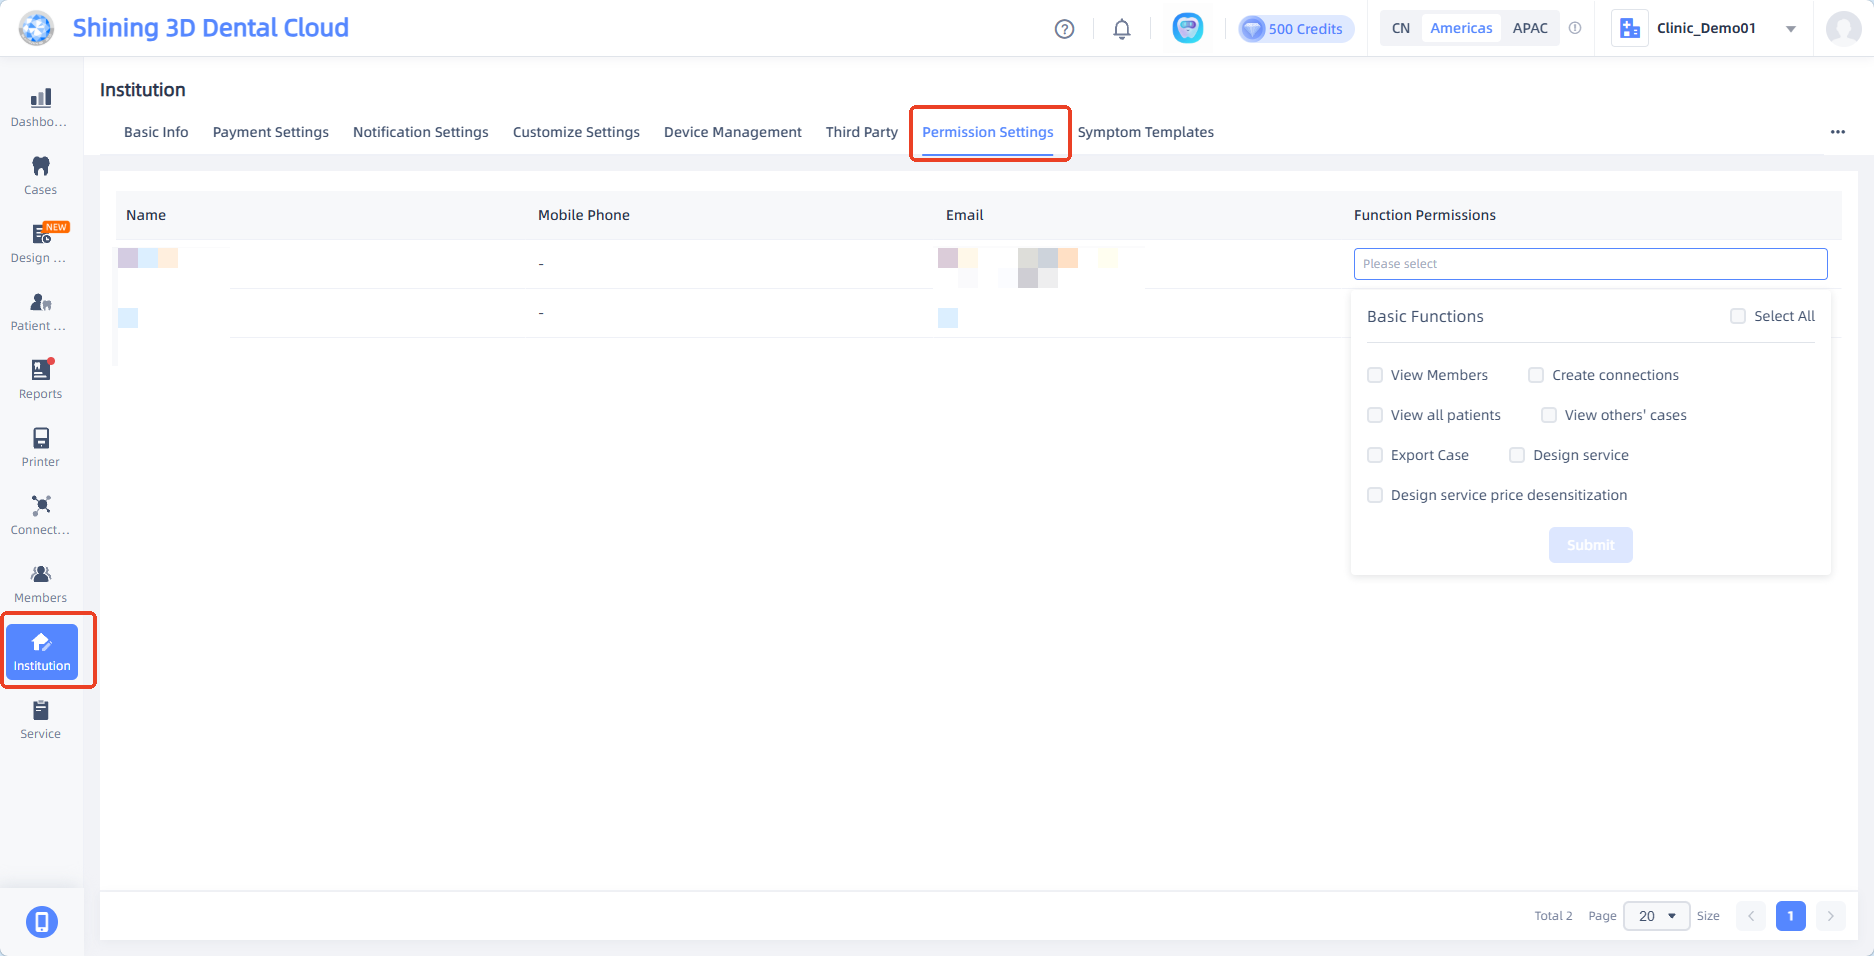
How to change Permission Settings for Members
The admin account will be in charge of enabling permissions for members from the portal.
Once logged in, click on Institution on left hand side and Permission Settings from top tool bar.
Enable the desired permission for each member as needed.
How to add Administrators
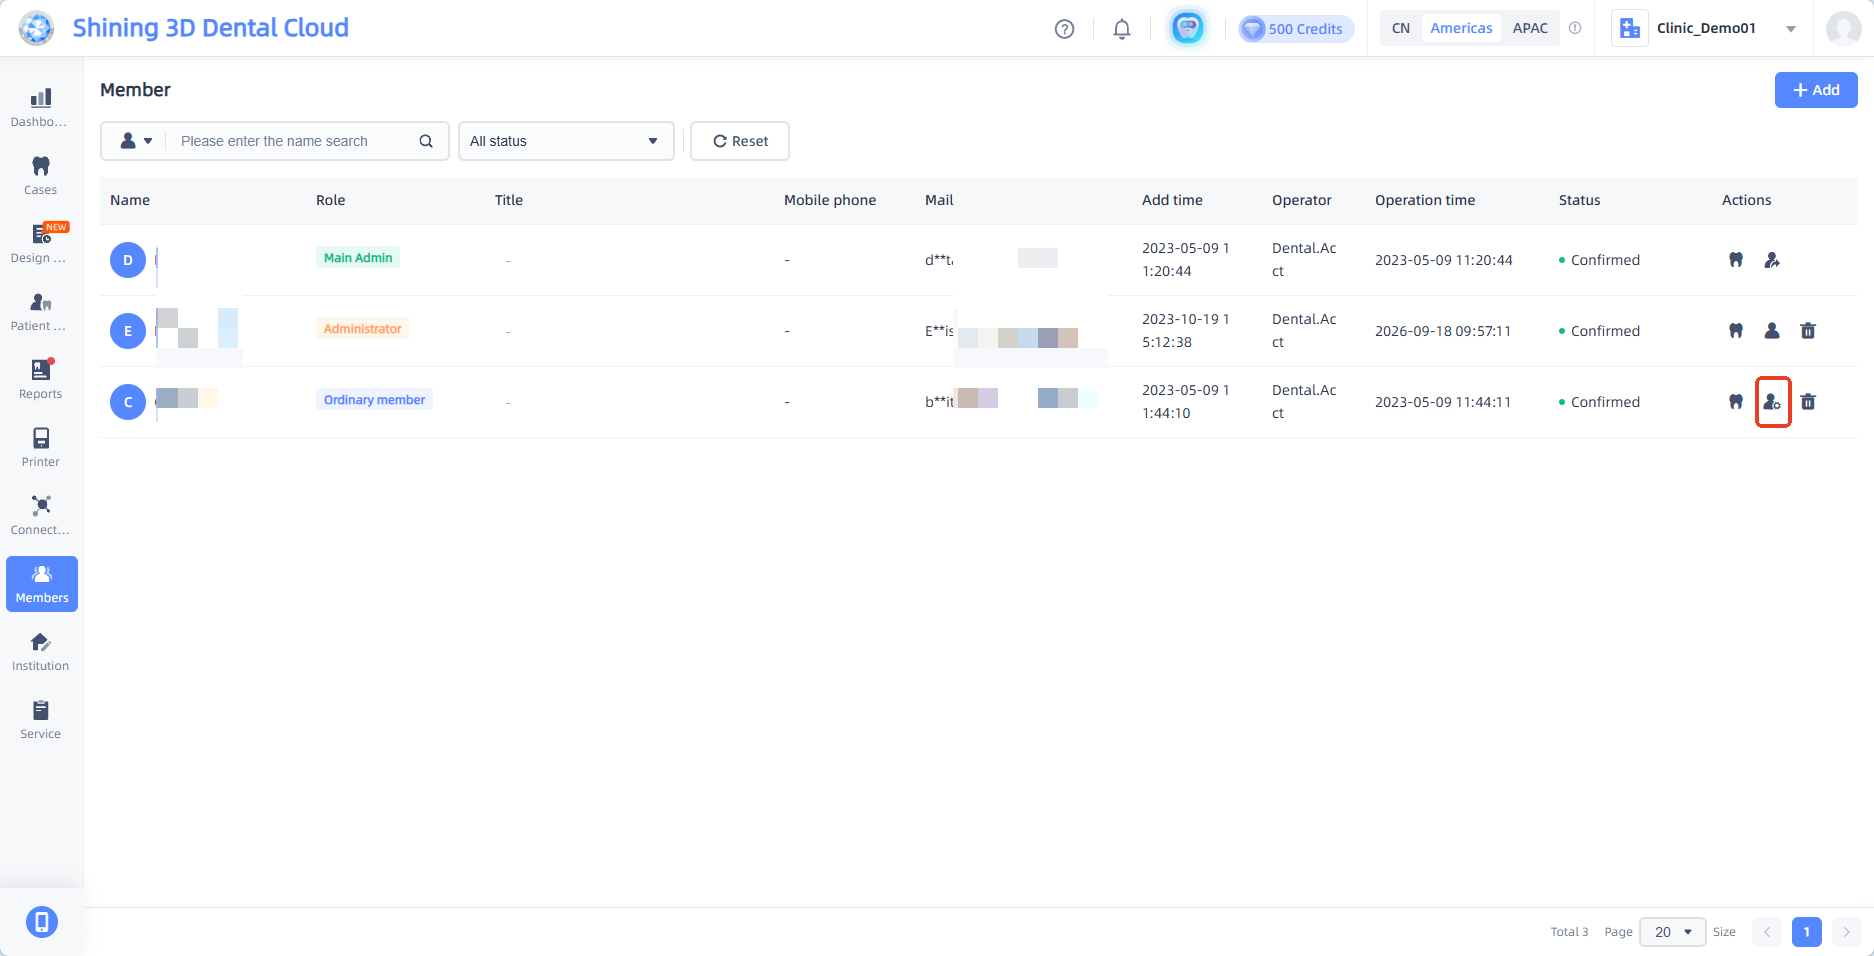
To add new administrators for the account, click on the members tab on the left hand toolbar.
All members of the organization will be shown here.
Members are divided into Main Admin, Administrator, and Ordinary member,
Both Main Admin and Administrator will have full access to all permissions while Ordinary Members will have restricted access unless modified as shown previously.
The Main Admin can elevate other members to administrator with the button shown under actions.