Overview
The oral health examination report is a visual tool focused on doctor-patient communication. The report utilizes AI to automatically identify oral diseases and provides visual information and treatment suggestions, allowing users to easily and accurately understand the patient's oral health status and design corresponding treatment plans. The new version of the software offers two different report versions: the official version, which emphasizes editing features, and the trial version, which focuses on communication features.
What are the differences between the beta version and the official version?
1. The differences between the official version and the trial version lie in aspects such as AI recognition, editing tools, communication tools, and measurement analysis.
| Function | Official Version | Beta Version |
| AI Recognition | Can identify various conditions | Dental calculus |
| Pigmentation | ||
| Cavities | ||
| Editing Tools | Endoscope | Model Screenshots |
| Panoramic Mode | ||
| Model Screenshots | ||
| Communication Tools | Orientation Markers | Magnifying Glass |
| Overview of dental diseases | Overview of dental diseases | |
| Explanation Mode | Explanation Mode | |
| Measurement Analysis | None | Tooth Crowding |
| Bolton Ratio | ||
| Deep overbite and overjet | ||
| Occlusal Colormap | ||
| Report Content | Contains measurement analysis data | |
2. How to Create New Symptoms?
2.1 Official Version
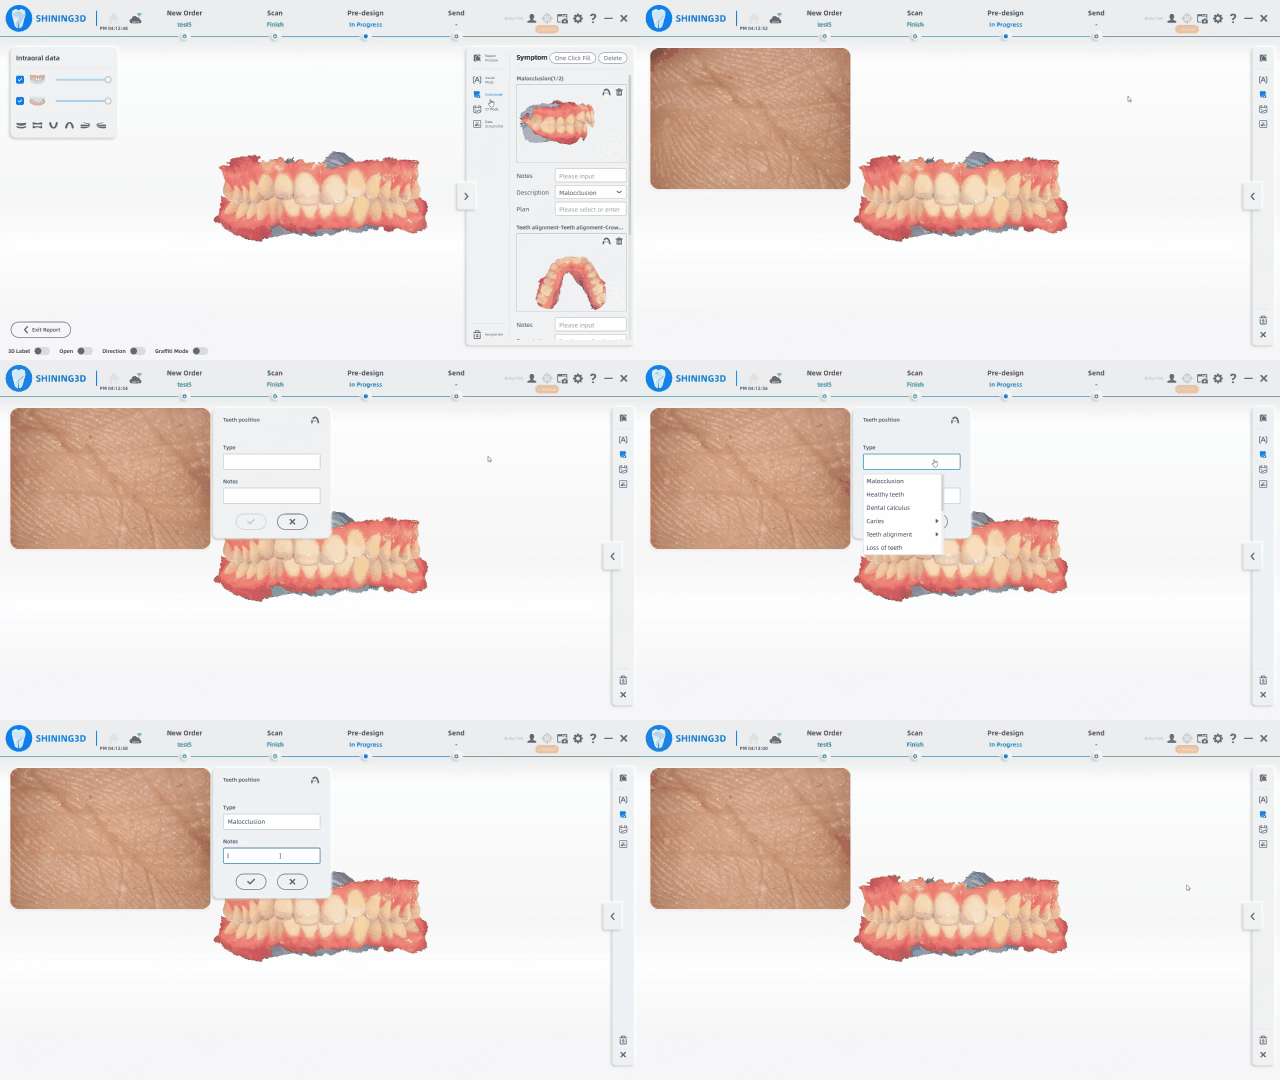
In the official version, you can create new symptoms using either the endoscope or model screenshots.
2.1.1 Endoscope
- Click on the "Endoscope" button on the right side of the interface to enter the scanning interface.
- Use the scanner to focus on the area to be photographed and click to capture the image.
- Set the tooth position, symptom type, and edit notes for the image.

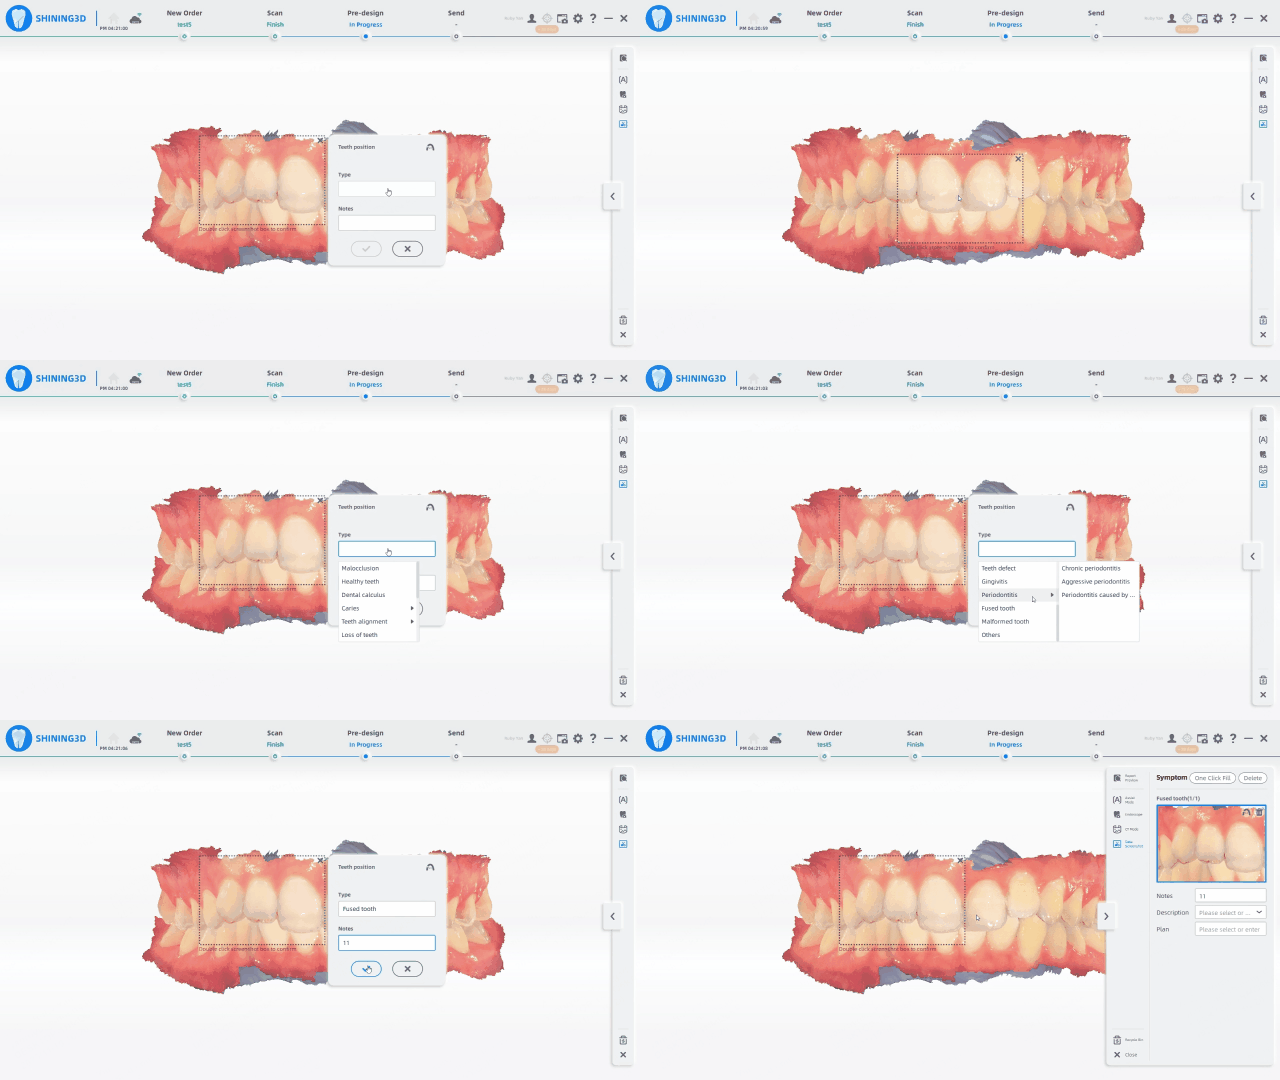
2.1.2 Model Screenshot
- Click on the "Model Screenshot" button on the right side of the interface to enter the framing interface.
- Drag the framing box to the area of the model you want to capture, and double-click to take the shot.
- In the pop-up window, select the tooth position, disease type, and edit notes.
- After completing the screenshot, you can view the results on the right side of the interface.

2.2 Beta Version
In the beta version, you can create new symptoms using model screenshots.
- Click on the "Create Symptom" option in the disease navigation on the right side of the interface to enter the framing interface.
- Drag the framing box to the area of the model you want to capture, and click "Create Symptom" below the framing box to complete the capture.
- In the pop-up window on the right, select the disease category, tooth position, edit notes, and solutions.
- After completing the screenshot, you can find the symptom you created in the disease navigation.
 Official Version Workflow

- AI can assist in identifying numerous types of symptoms. We may manually select them ourselves, or employ the “all select first options” function to choose the first case at each location, thereby facilitating the rapid creation of a comprehensive list.

- Create New Symptoms or Not
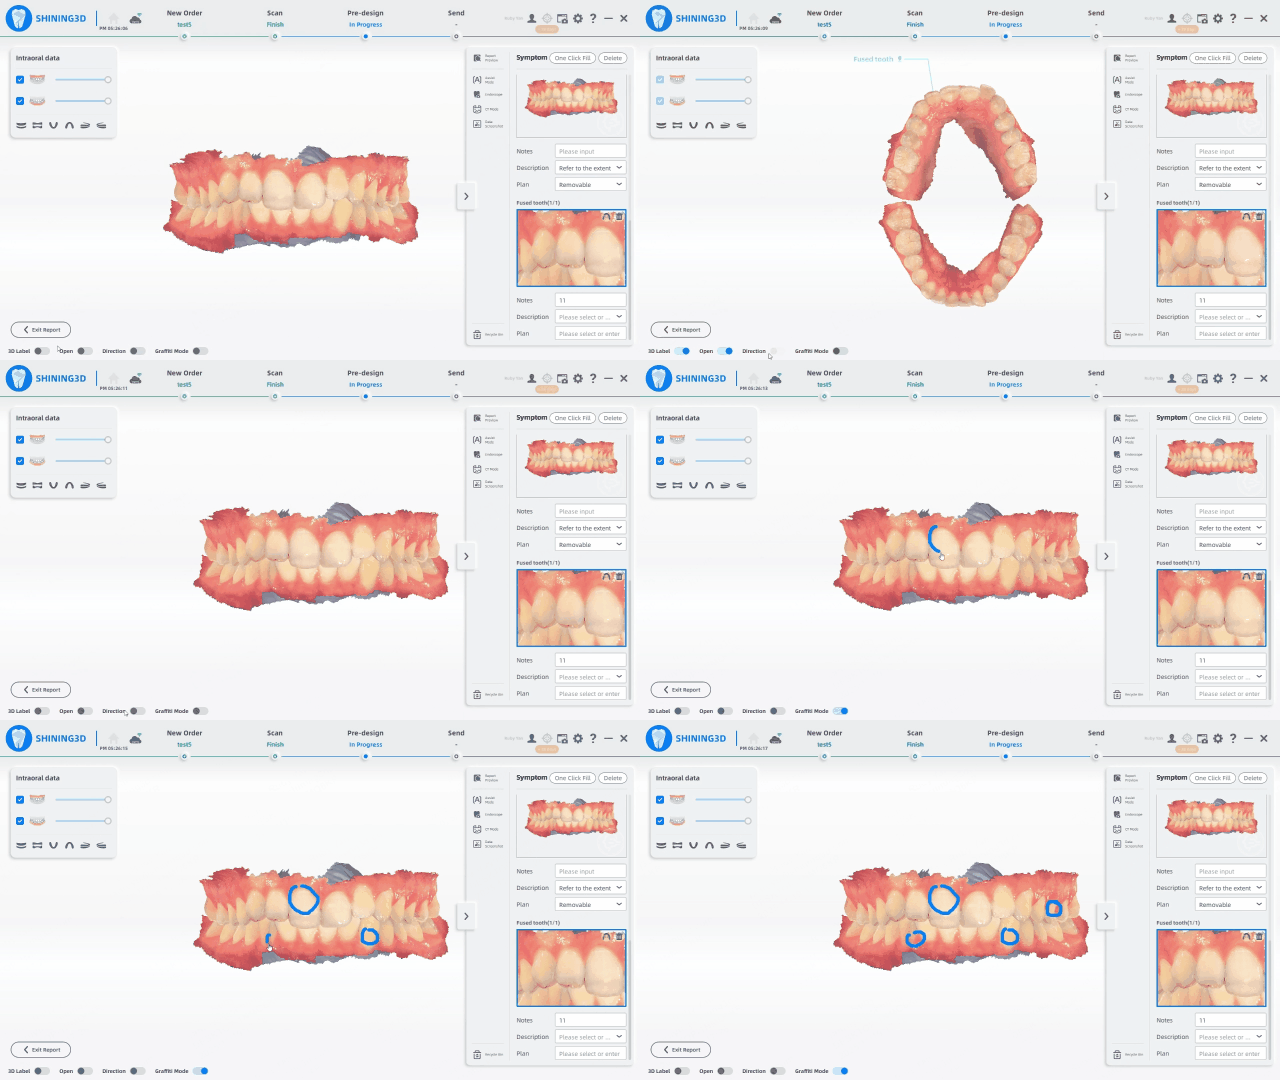
- Communication Tools
Users can communicate with patients through 3D labels and doodle mode, thereby enhancing doctor-patient communication.

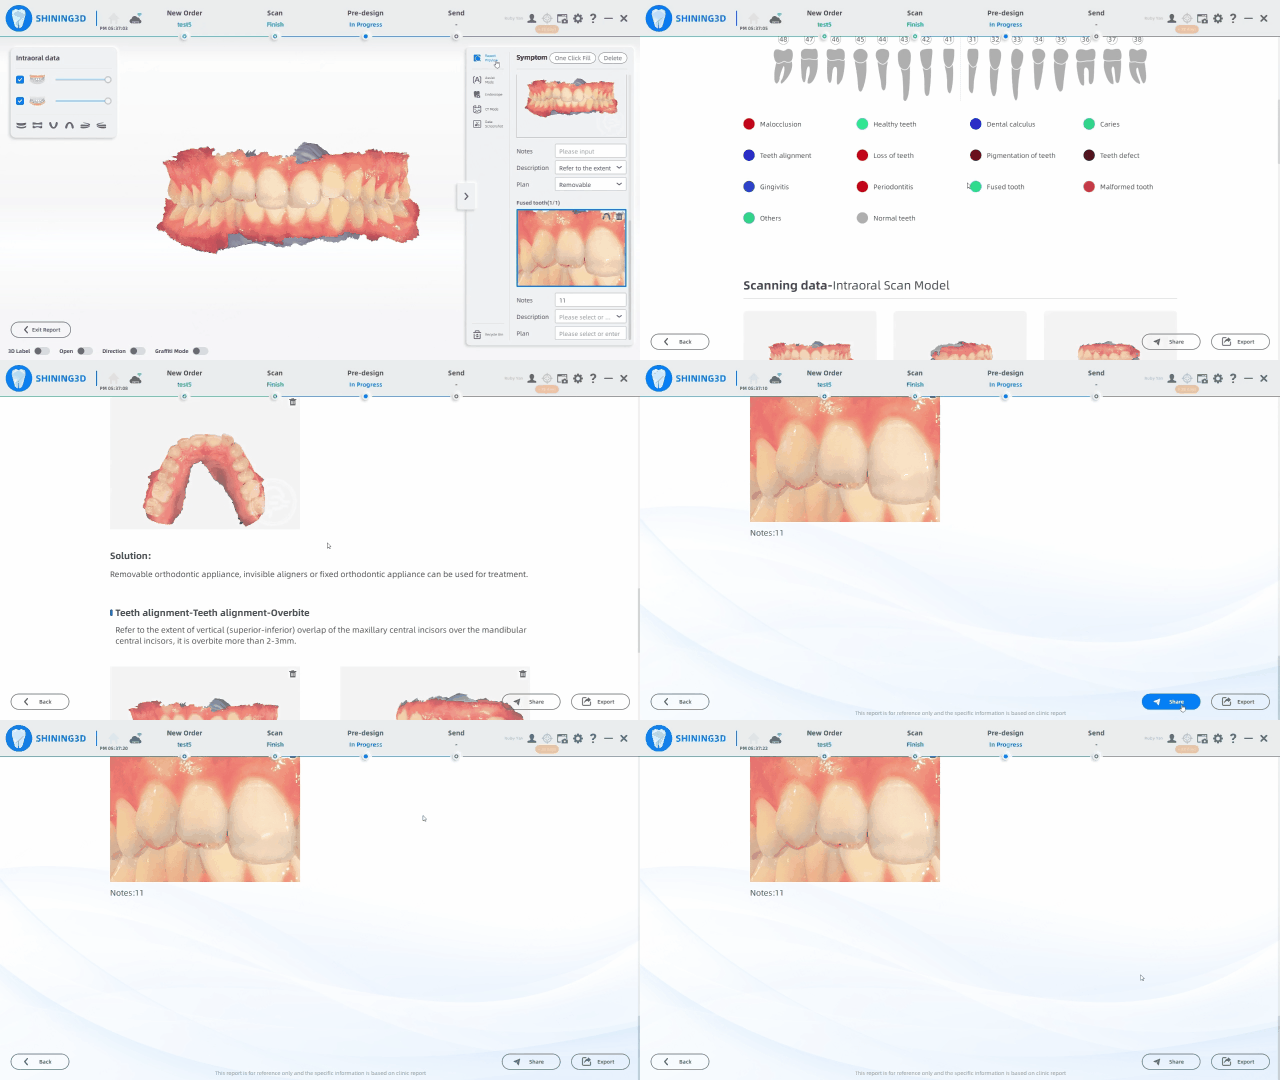
- Generate Report
After completing the modification and confirmation of the medical condition, click ‘Report Preview’ on the right side of the interface to access the report screen. You may share the report via the automatically generated QR code or save it as a PDF file.

Beta Version Workflow
First, users can click “enter beta version” to switch to the beta version.

- AI-assisted Diagnosis
The AI function can only distinguish the most common 3 kinds of diseases: caries, pigmentation and calculus, whereas users can add others in the symptom edition stage.

- Symptom Edition or Not
- Communication Tools
Users can communicate with patients using not only 3D labels and graffiti mode but also measurement analysis tools and observation glasses. Measurement analysis tools can briefly overview the malformation situation, whereas the result cannot be revised as in MentronTrack. The report will include the measurement result.

For the observation glass:
Drag the glass on the model to observe the details of the model.
Double-click the glass to reset the glass.
double-click the model to apply the glass on the corresponding position.
- Quick Generation
Users can generate a report quickly without AI-assisted diagnosis.

How to generate a report in the beta version?
After symptom edition and communication, users can generate a report by clicking “generate report” in the lower-right corner. Similarly, a QR code can be generated after uploading the report to the cloud.

